The next piece of cloud software which has caught my attention is Juju, a tool which allows you to effortlessly deploy software to any cloud, and scale it with the touch of a button.
Juju deploys software in the form of Charms, a collection of scripts and deployment instructions that implements industry best practices and knowledge about that particular software package.
Today we are going to take a deep dive into Juju, and explore how it works, how to set it up and how to deploy and scale some common software.
What is Juju?
Juju is a tool developed by Canonical which enables developers and techops teams to quickly and reliably deploy complex software services to any cloud, and gives them the ability to scale those same services to any level desired with no additional effort.
Juju was developed to capture expert knowledge about a specific software service, and distill that knowledge into a set of deployment instructions which implement the very best industry practices. These instructions are generic enough to be used in any deployment, and can work alongside any mix or match of software services.
The deployment instructions are known as Charms, and if you deploy a Charm, say mysql, you know that your mysql service has been written and configured by mysql experts, meaning you can spend less time messing around with configs and accept the defaults selected by the experts.
Juju’s Architecture
As with any cloud software, Juju has a well defined architecture which contains many levels of abstraction. Here is a brief overview of what the main concepts are:
- Clouds: Clouds are the backing service that provides computing resources in the forms of machines, which are simply just virtual instances. Juju supports all public clouds like AWS, Azure, GCP and private clouds like Openstack deployments, as well as LXD / LXC locally.
- Controllers: A controller is the first machine started on the cloud, and acts as a gateway to managing the deployment and creating new machines. It holds all of the cluster configuration and credentials.
- Models: A model can be considered the architecture diagram for a cluster, and is a collection of related services. Models are attached to a single controller.
- Machines: A machine is simply a cloud instance that Juju spins up, deploys an operating system to and installs software onto.
- Charms: A charm is instructions on how to deploy, install and scale a particular application, and is written and maintained by experts of that application.
- Bundles: A bundle is a collection of charms, which when deployed gives you a fully working service with many complex parts working together seamlessly.
- Units: A unit is an instance of an application, typically hosted on its own machine. To scale, you simply add more units, and Juju will add more machines and handle deployment automatically.
- Relations: A relation is the mapping which enables you to connect applications together, and defines what endpoints are compatible with what interface, and how scaling is implemented.
Things may seem a bit complication by reading the definitions, but they will become much clearer once we see the above in action. Let’s get to it.
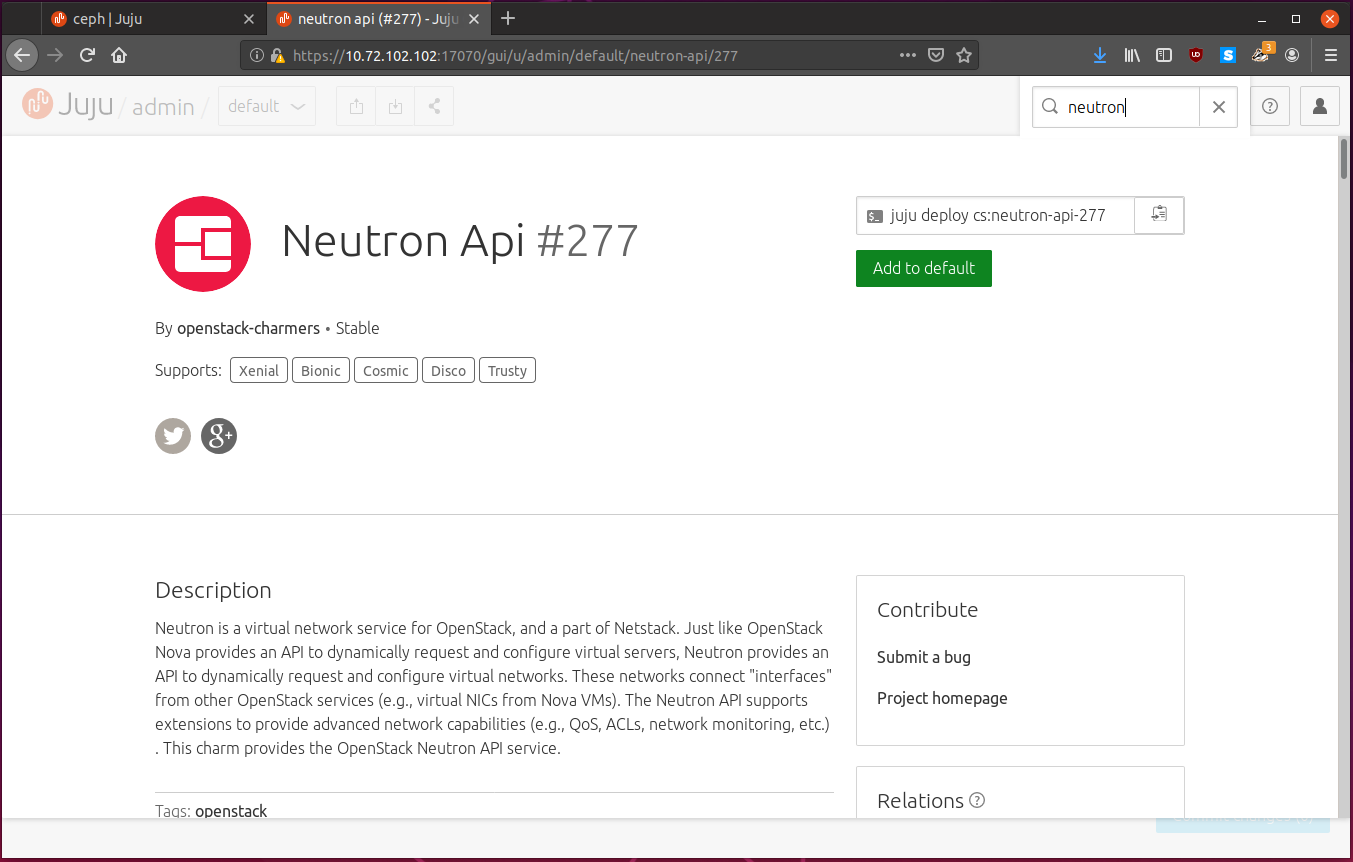
Where Can I Find Charms?
Charms are collected and distributed by the Charms Store.
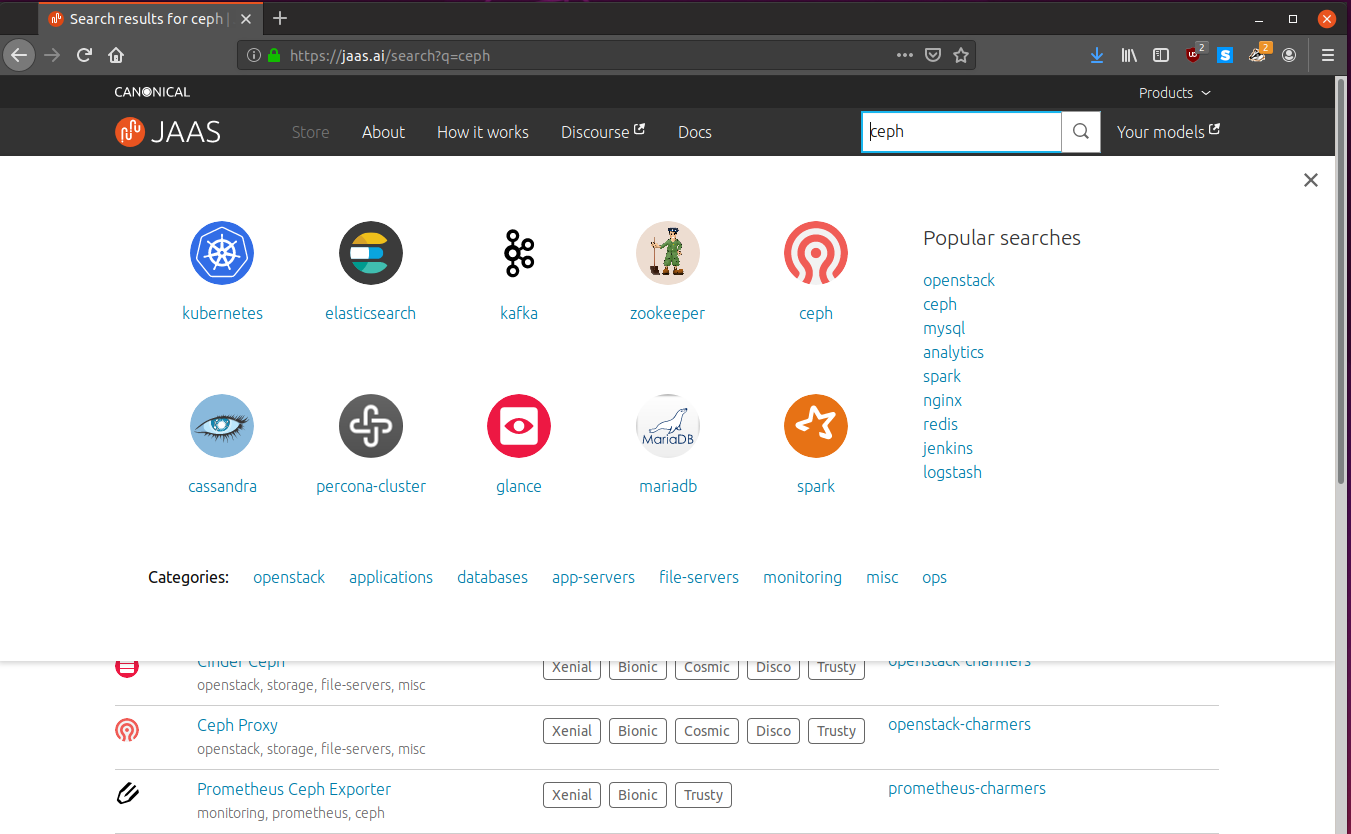
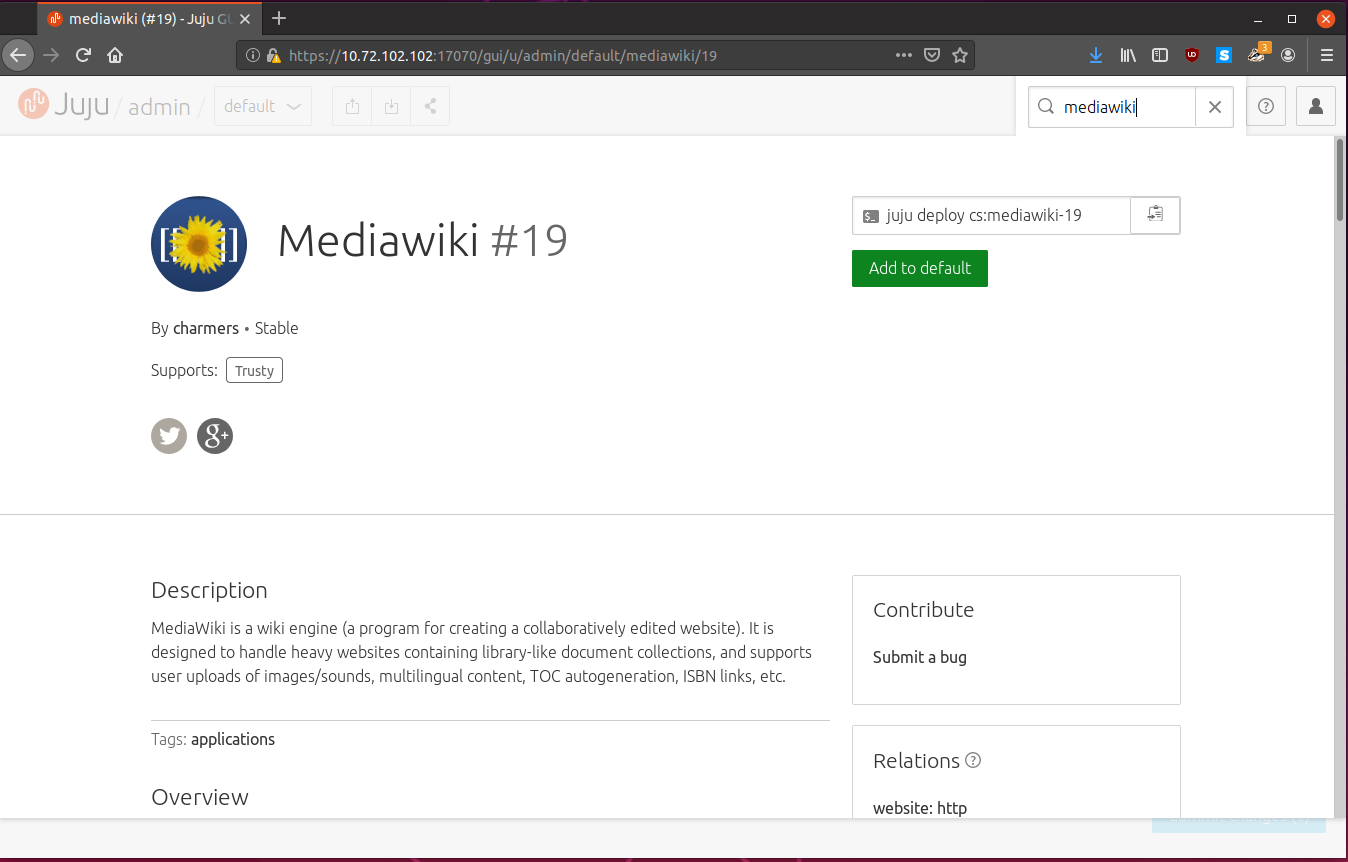
You can search for almost anything and there will likely be a charm for it:
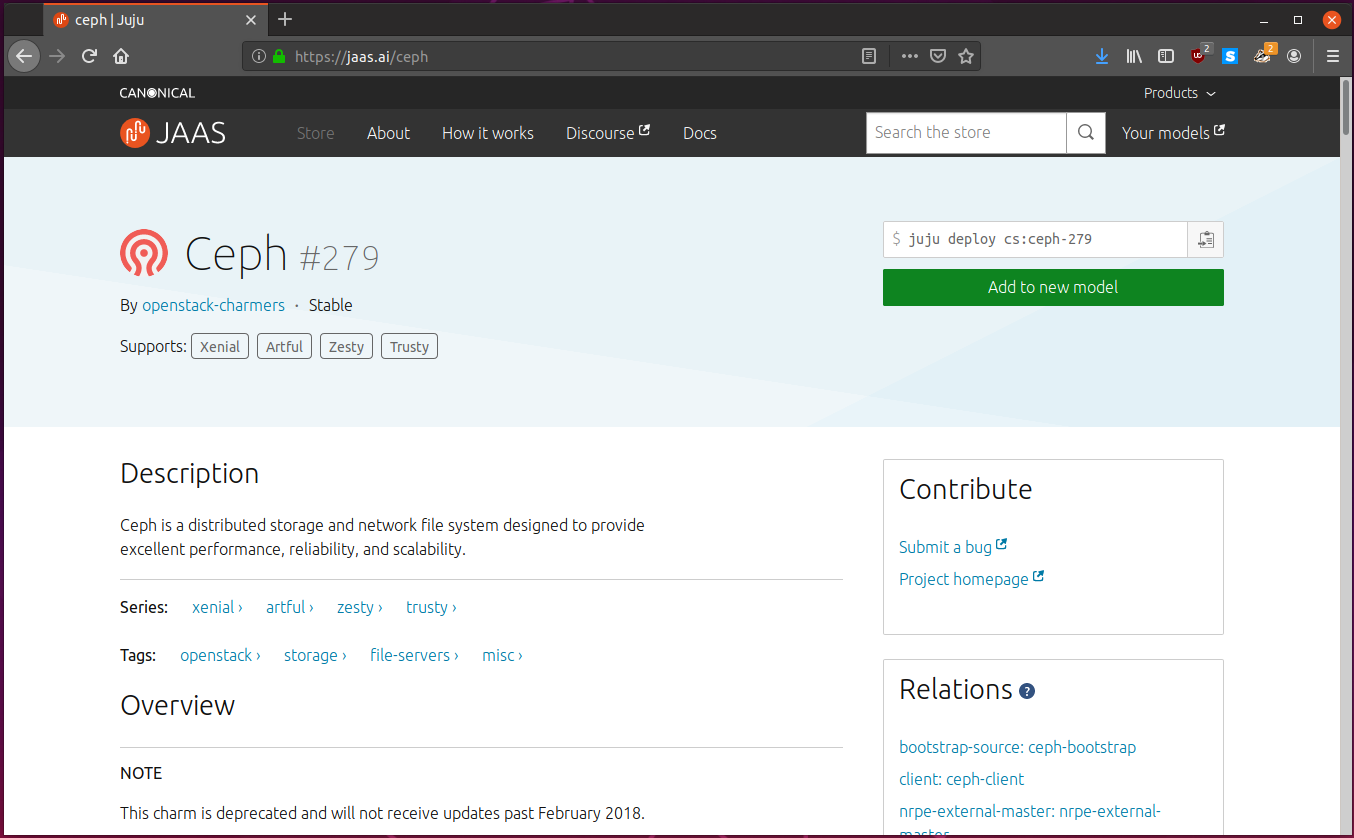
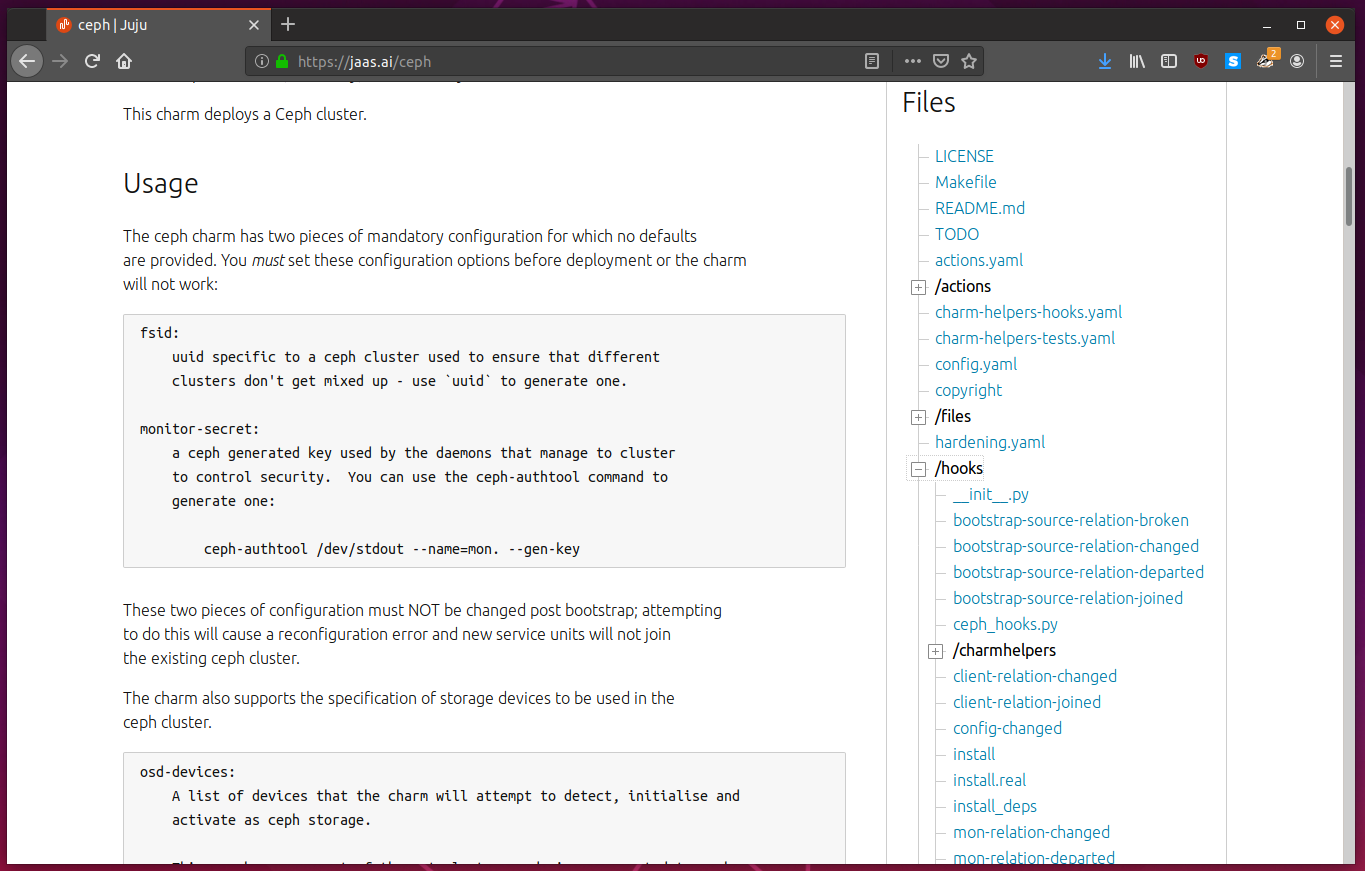
On the right hand side, you can see the contents of the charm, and look through the files easily.
Using Juju to Deploy and Scale Applications
We are going to install Juju on our machine and use it to deploy a simple Mediawiki service that we can easily scale.
The “cloud” will deploy onto will be our own computer, as we will be configuring Juju to use the lxd backend.
Installing Juju
The latest stable release of Juju can be installed from the snap:
$ sudo snap install juju --classic
Well that was easy. That is because we just installed the Juju client. The client will connect to controllers to manage clusters from there. This is useful since we can have multiple clients manage the same controller.
For this guide, we will also need lxd installed:
$ sudo snap install lxd
$ lxd init --auto
Creating a Controller
The first thing we need to do is create a controller. To see what clouds Juju supports, we can run:
$ juju clouds --local
Cloud           Regions  Default          Type        Description
aws                  19  us-east-1        ec2         Amazon Web Services
aws-china             2  cn-north-1       ec2         Amazon China
aws-gov               2  us-gov-west-1    ec2         Amazon (USA Government)
azure                30  centralus        azure       Microsoft Azure
azure-china           2  chinaeast        azure       Microsoft Azure China
cloudsigma           12  dub              cloudsigma  CloudSigma Cloud
google               18  us-east1         gce         Google Cloud Platform
joyent                6  us-east-1        joyent      Joyent Cloud
oracle                4  us-phoenix-1     oci         Oracle Compute Cloud Service
oracle-classic        5  uscom-central-1  oracle      Oracle Compute Cloud Service
rackspace             6  dfw              rackspace   Rackspace Cloud
localhost             1  localhost        lxd         LXD Container Hypervisor
We see that we can target localhost, since it uses the lxd backend.
To create a controller we use the command juju bootstrap [cloud] [controller name]:
$ juju bootstrap --bootstrap-series=disco localhost lxd-controller
Creating Juju controller "lxd-controller" on localhost/localhost
Looking for packaged Juju agent version 2.6.6 for amd64
To configure your system to better support LXD containers, please see: https://github.com/lxc/lxd/blob/master/doc/production-setup.md
Launching controller instance(s) on localhost/localhost...
 - juju-581394-0 (arch=amd64)
Installing Juju agent on bootstrap instance
Fetching Juju GUI 2.15.0
Waiting for address
Attempting to connect to 10.72.102.102:22
Connected to 10.72.102.102
Running machine configuration script...
Host key fingerprint is SHA256:RPZQa95uAxhJX9sjh5wyNJvNVbyZkQBAUN6MQrvLFco
+---[RSA 2048]----+
|       oO==.o.ooo|
|      .+o*+X * o.|
|       o++XoO + =|
|      ..+=.+ o = |
|       ES.o .    |
|      . o  o     |
|       o    +    |
|           . .   |
|                 |
+----[SHA256]-----+
Bootstrap agent now started
Contacting Juju controller at 10.72.102.102 to verify accessibility...

Bootstrap complete, controller "lxd-controller" now is available
Controller machines are in the "controller" model
Initial model "default" added
I wanted the controller to use Ubuntu 19.04, Disco Dingo, so I set --bootstra-series=disco.
Juju will normally default to the latest Ubuntu LTS when deploying controller
machines if possible.
Juju will connect to the cloud and ask for a new instance, update the instance, and then install Juju and its agents to it. Once we are done, we can run:
$ juju controllers
This will give us a list of all known controllers, and their details:

Opening the Juju GUI
Juju comes with a GUI by default! If you ever feel lost, simply use the GUI instead. We can get our login credentials by running:
$ juju gui
GUI 2.15.0 for model "admin/default" is enabled at:
  https://10.72.102.102:17070/gui/u/admin/default
Your login credential is:
  username: admin
  password: 1fc5ba97ded275b96b1eac9f55a20024
Head on over to the URL in the output, and you will likely have to dismiss some self-signed SSL certificate errors, and we find the login screen:
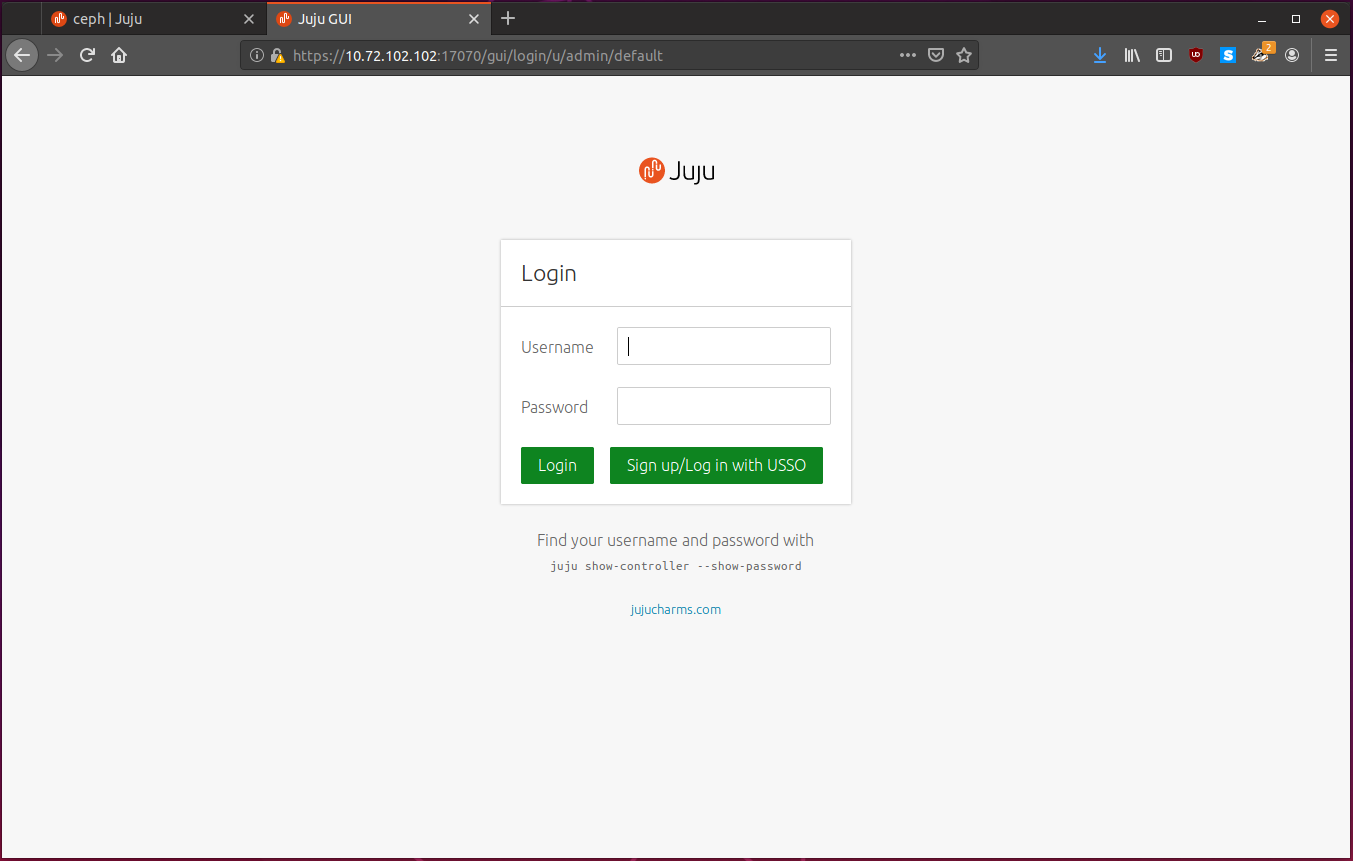
Enter in the creds from the output, and we find ourselves with an empty model:
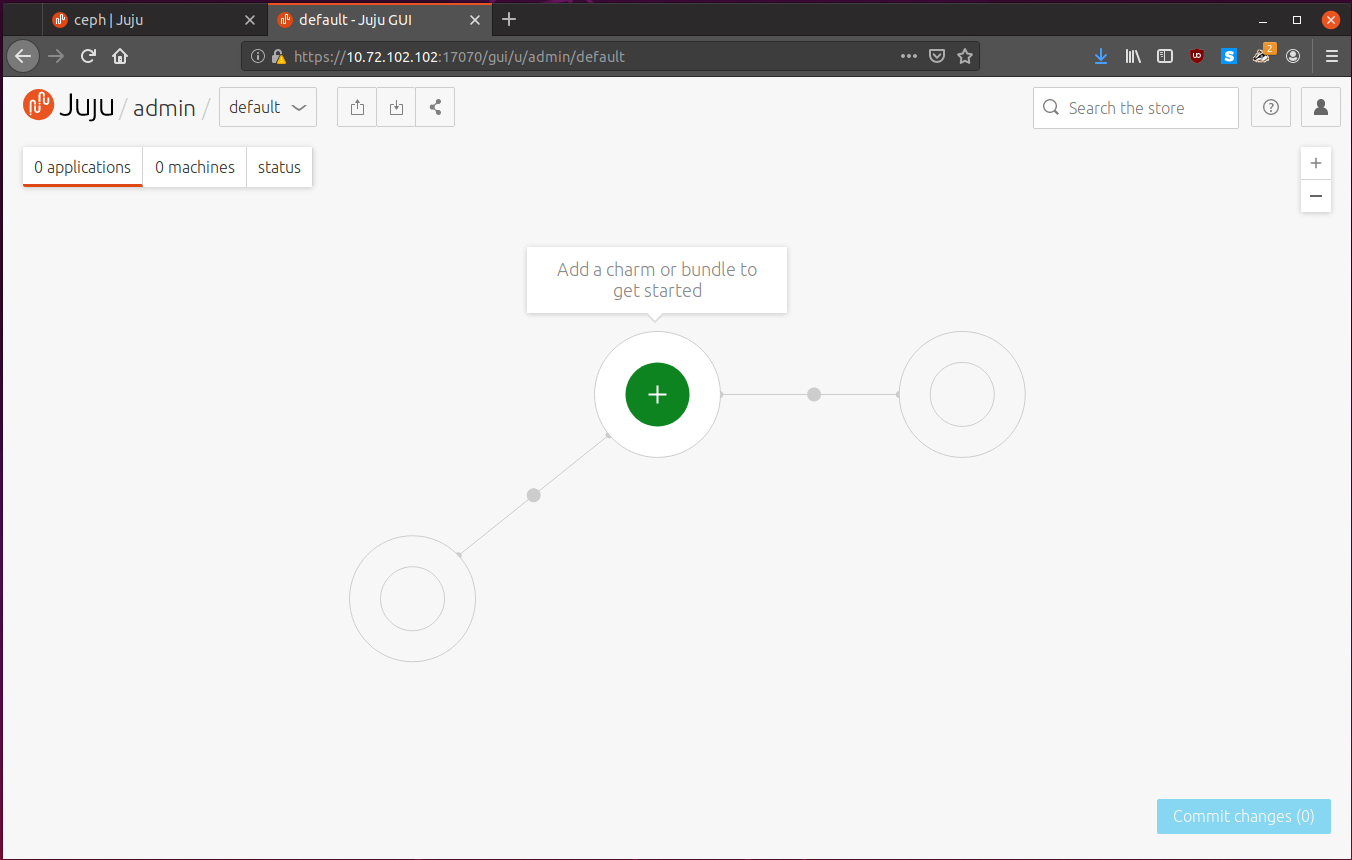
You can even explore the charm store from the GUI. Nice!
Planning our Deployment
Today we are going to deploy mediawiki. Mediawiki will be using mysql as its database backend, and we will loadbalance requests with haproxy.
We are going to deploy these services so we can scale them effortlessly at a moments notice.
Deploying our Services
We can deploy a charm with the juju deploy [charm] command:
$ juju deploy mediawiki
Located charm "cs:mediawiki-19".
Deploying charm "cs:mediawiki-19".
Juju fetches Charm information, for the specific charm requested, which is
cs:mediawiki-19. Juju will create a new instance in lxd, deploy the correct
Ubuntu image, install the Juju agent and deploy the charm.
We can now see a Mediawiki node on the Juju GUI:
We can also view the status from the command line, with the extremely useful
juju status command:
$ juju status
Model    Controller      Cloud/Region         Version  SLA          Timestamp
default  lxd-controller  localhost/localhost  2.6.6    unsupported  12:23:26+12:00

App        Version  Status       Scale  Charm      Store       Rev  OS      Notes
mediawiki           maintenance      1  mediawiki  jujucharms   19  ubuntu

Unit          Workload     Agent      Machine  Public address  Ports  Message
mediawiki/0*  maintenance  executing  0        10.72.102.206          (install) Installing packages

Machine  State    DNS            Inst id        Series  AZ  Message
0        started  10.72.102.206  juju-d6b106-0  trusty      Running
The status command is broken up into sections. The top shows the model and controller which the Juju client knows of, and then it lists the applications, units and machines managed by the controller for the specific model.
We can see the status for the mediawiki application is maintenance, since
the service is not up and running yet. Under the unit section, the Message
status tells us that the mediawiki packages are currently being installed.
If we wait a few moments and try again we see:
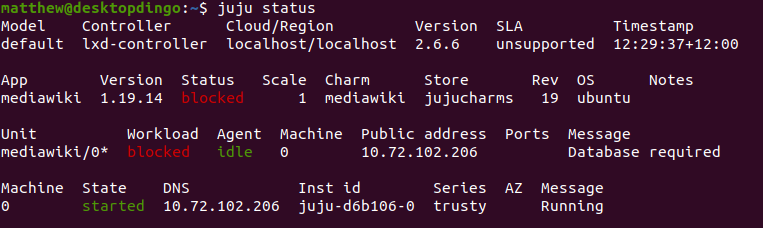
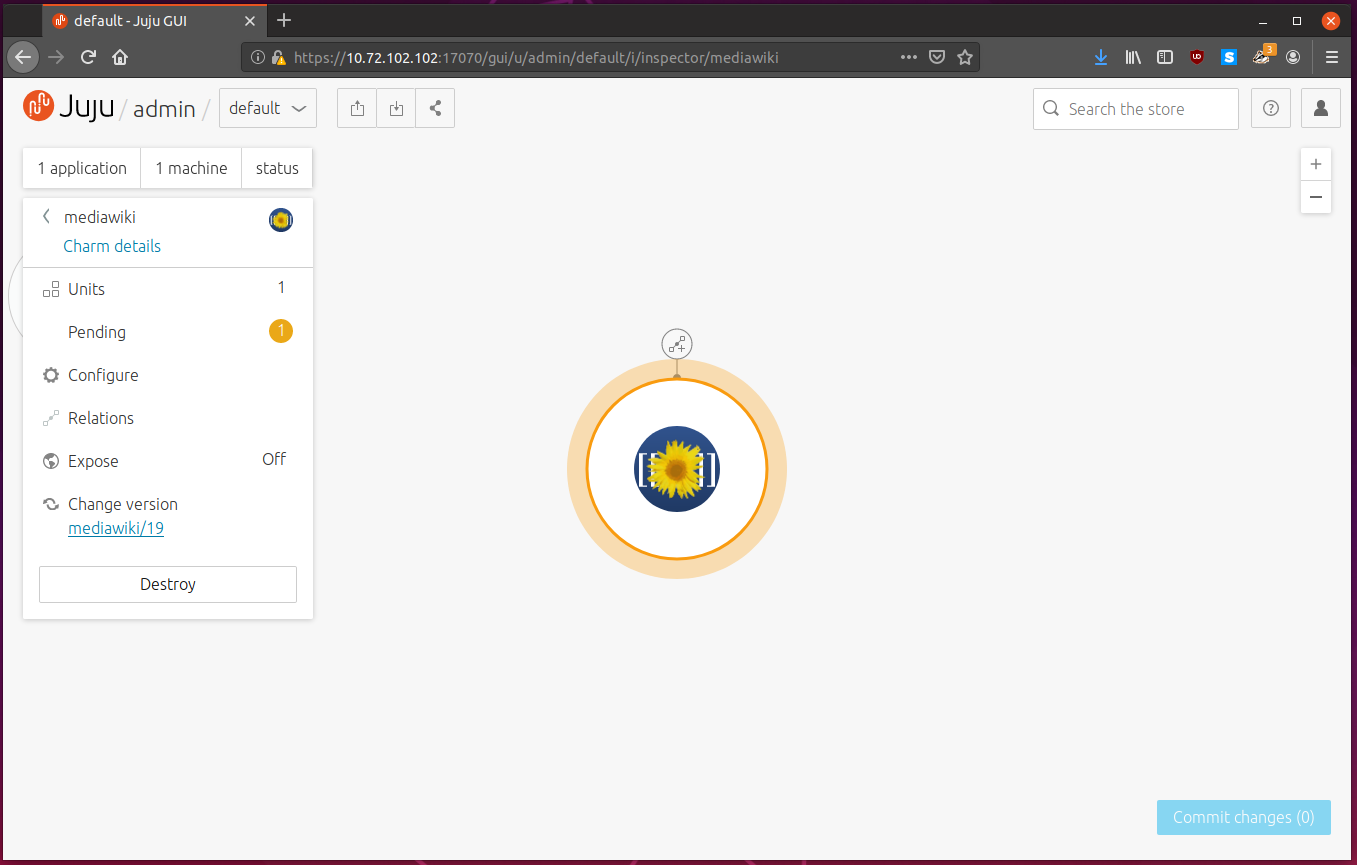
Mediawiki is blocked, and the deployment can’t progress any further. Looking at
the Message section again, it says “Database required”.
Time to deploy mysql. While we are at it, we will deploy haproxy:
$ juju deploy mysql
Located charm "cs:mysql-58".
Deploying charm "cs:mysql-58".
$ juju deploy haproxy
Located charm "cs:haproxy-54".
Deploying charm "cs:haproxy-54".
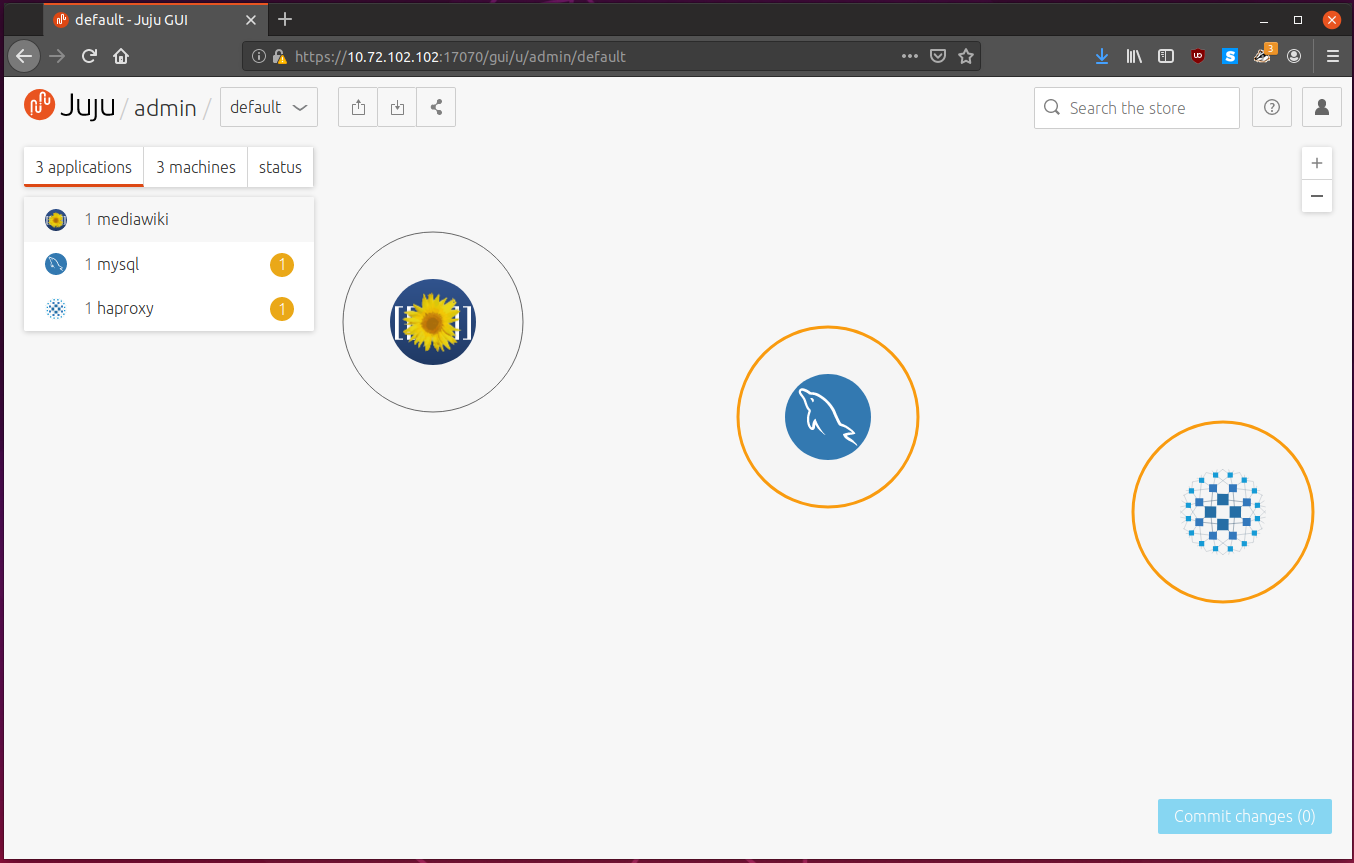
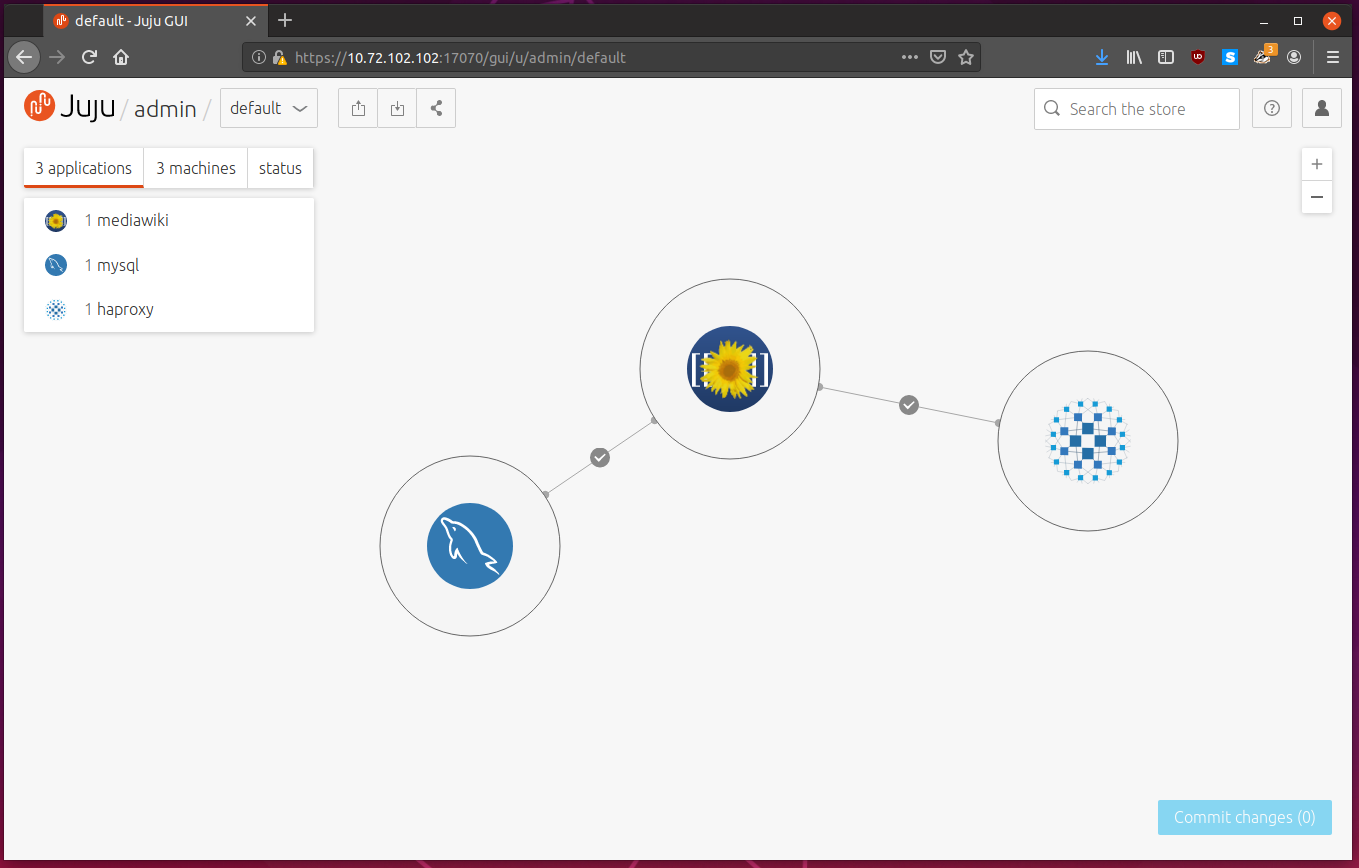
The GUI now shows three applications in the model:
Once the machines have been deployed we can again review juju status:
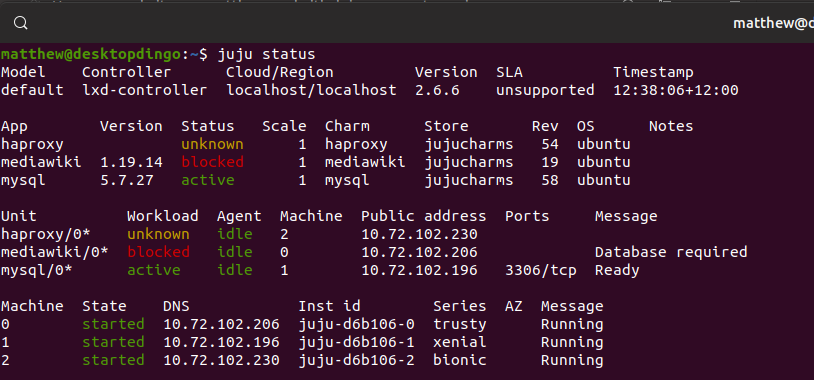
We can see that haproxy, mediawiki and mysql are started, and are in various states. For each application, we get a list of IP addresses, and what machine each service is installed to.
Time to link everything together. We do this by adding relations.
We know that mediawiki is waiting on a database, and mysql is running on a different machine. By defining a relation, we can say link the endpoint which expects a database from the mediawiki charm, to the mysql database endpoint.
Doing so creates a mapping, and any services added in the future will stick to this mapping.
We can add a relation with juju add-relation [endpoint] [endpoint].
$ juju add-relation mediawiki:db mysql
$ juju add-relation mediawiki haproxy
With these relations added, mediawiki will now connect to mysql, and prepare the database, and haproxy will load balance http requests to mediawiki.
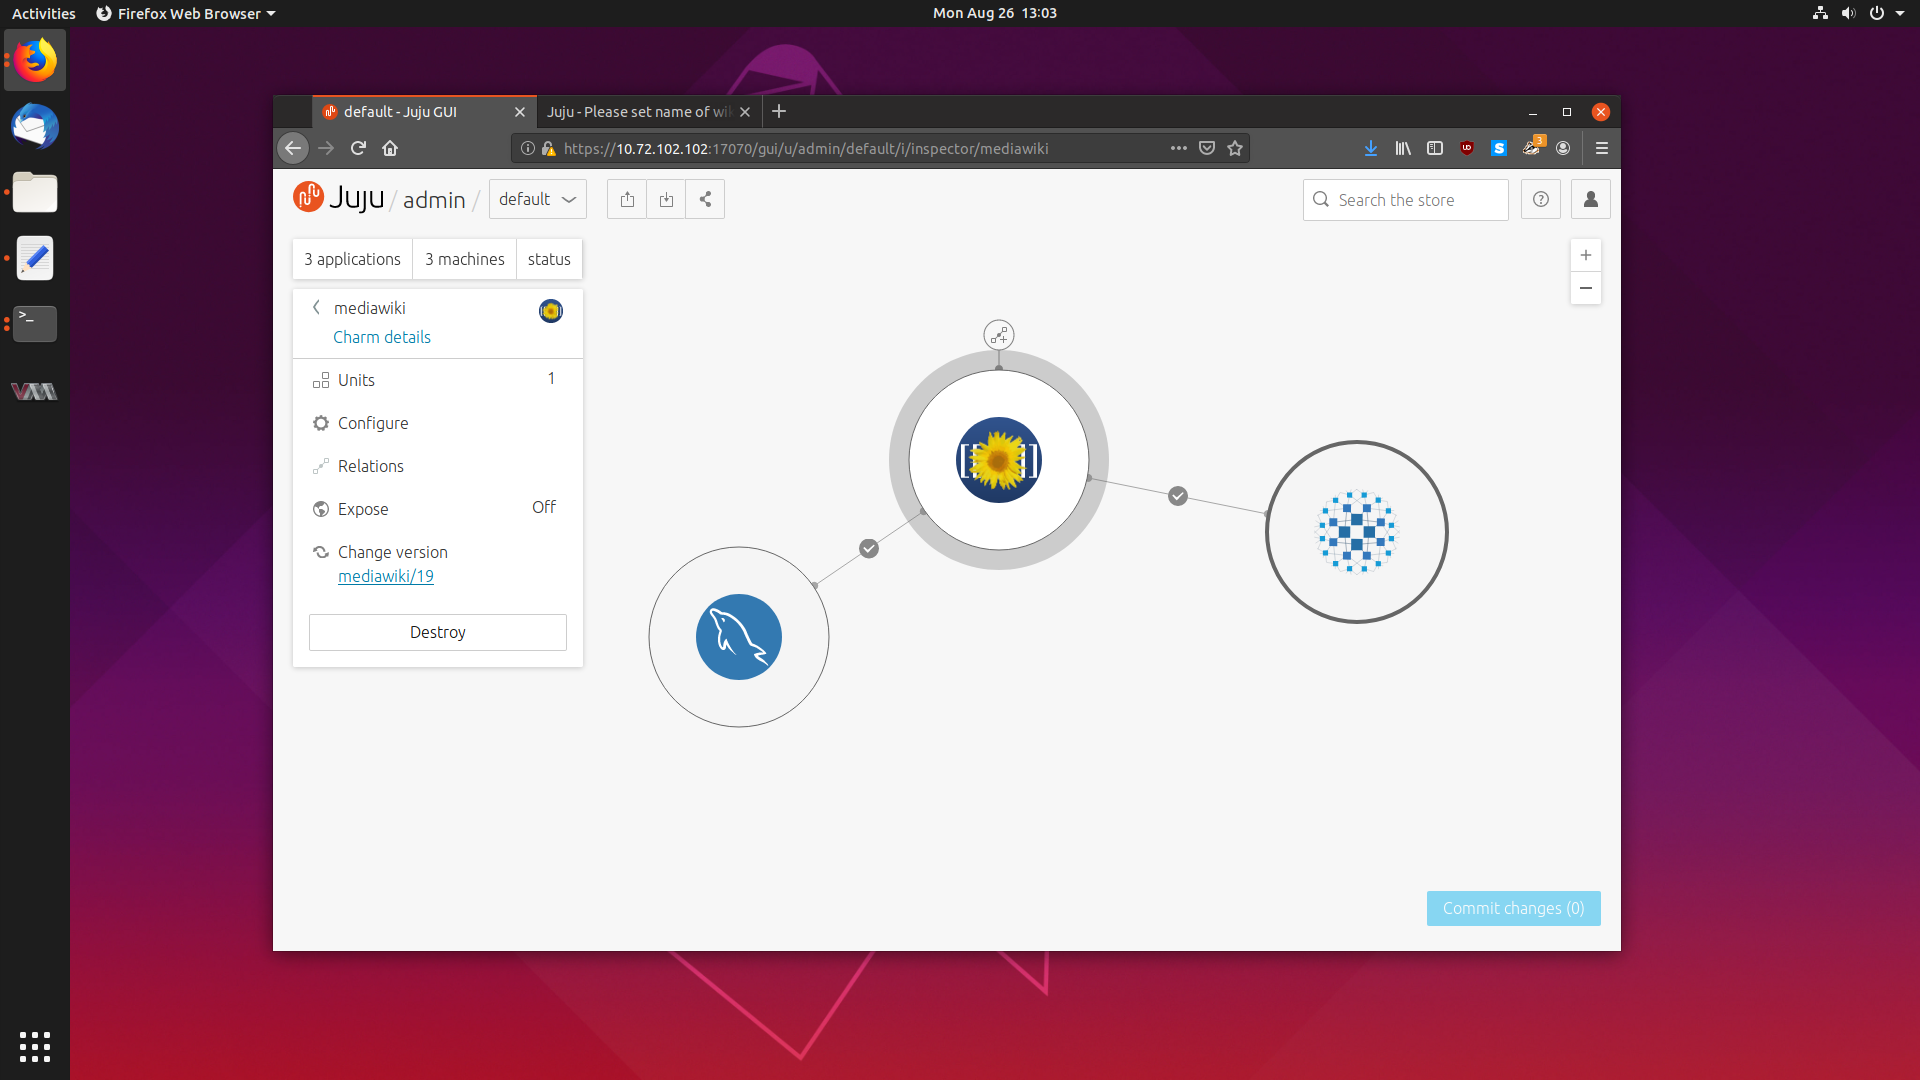
The GUI has changed to reflect these relations, with lines added between applications:
We can check juju status to see if everything is now properly deployed:
$ juju status
Model    Controller      Cloud/Region         Version  SLA          Timestamp
default  lxd-controller  localhost/localhost  2.6.6    unsupported  12:50:26+12:00

App        Version  Status   Scale  Charm      Store       Rev  OS      Notes
haproxy             unknown      1  haproxy    jujucharms   54  ubuntu
mediawiki  1.19.14  active       1  mediawiki  jujucharms   19  ubuntu
mysql      5.7.27   active       1  mysql      jujucharms   58  ubuntu

Unit          Workload  Agent  Machine  Public address  Ports     Message
haproxy/0*    unknown   idle   2        10.72.102.230   80/tcp
mediawiki/0*  active    idle   0        10.72.102.206   80/tcp    Ready
mysql/0*      active    idle   1        10.72.102.196   3306/tcp  Ready

Machine  State    DNS            Inst id        Series  AZ  Message
0        started  10.72.102.206  juju-d6b106-0  trusty      Running
1        started  10.72.102.196  juju-d6b106-1  xenial      Running
2        started  10.72.102.230  juju-d6b106-2  bionic      Running
Everything looks good. Note the series of the machines? Mediawiki is deployed to machine 0, mysql to machine 1 and haproxy to machine 2. 0 is running trusty, 1 is running xenial and 2 is running bionic.
Charms can support multiple Ubuntu series, and Juju deploys the latest Charm for the requested series.
All that’s left to do now to use our mediawiki service is to expose the firewall
port. We can use juju expose to do that in a friendly way:
$ juju expose haproxy
Note how we only expose haproxy? That is the only service that needs to be seen by the outside world. We don’t need to expose mediawiki or mysql itself, and doing so would be bad for security.
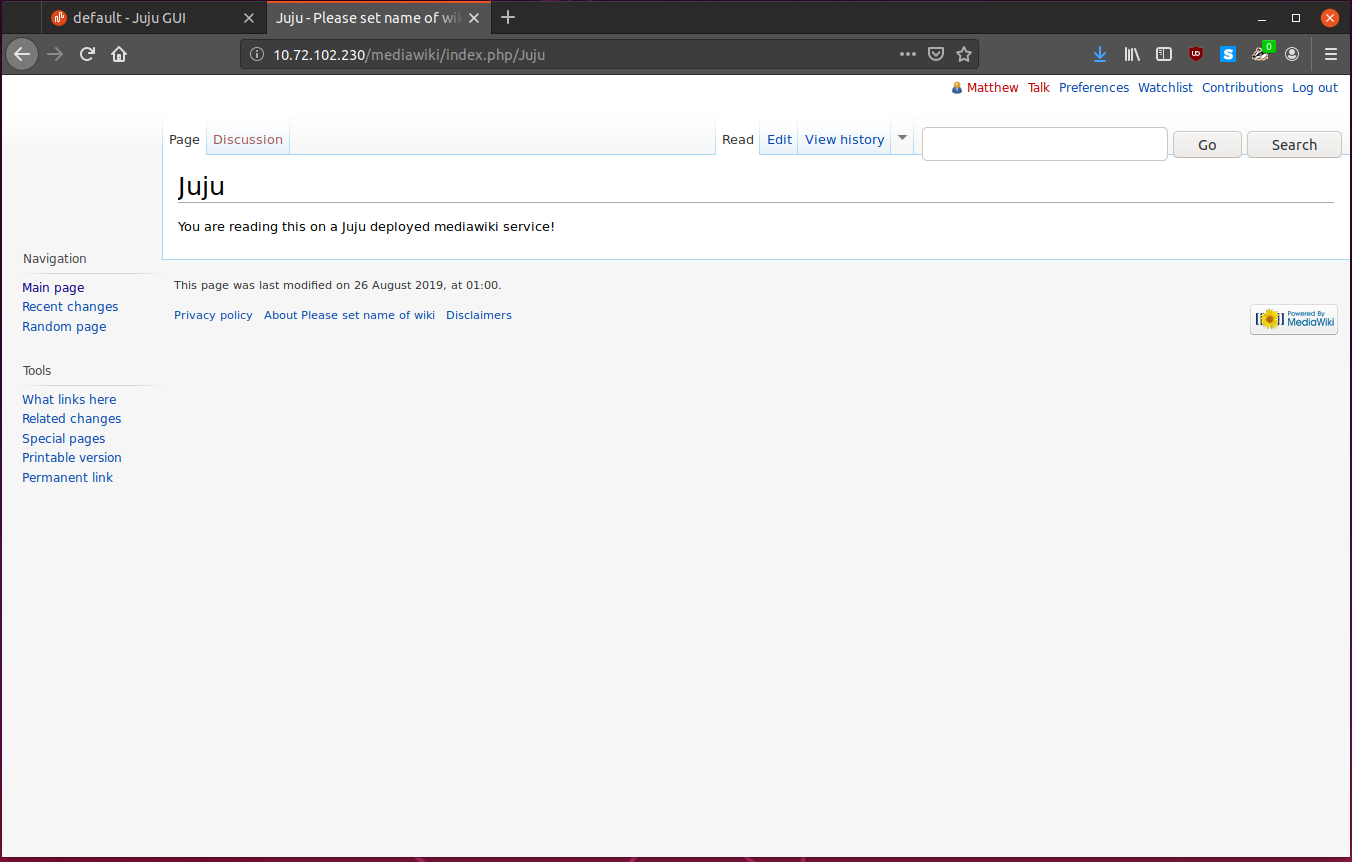
We can now connect to our mediawiki service. In your web browser, go to the
address of the haproxy server, which for me is: 10.72.102.230.

Go ahead and make an account and modify some pages. Everything “just works”.
Modifying Charm Configuration
While the charm does come preconfigured with defaults set by experts, sometimes we want to modify the configuration to suit ourselves better, and Juju lets you easily do that.
To view what configuration a specific application supports, we can run
juju config [application]:
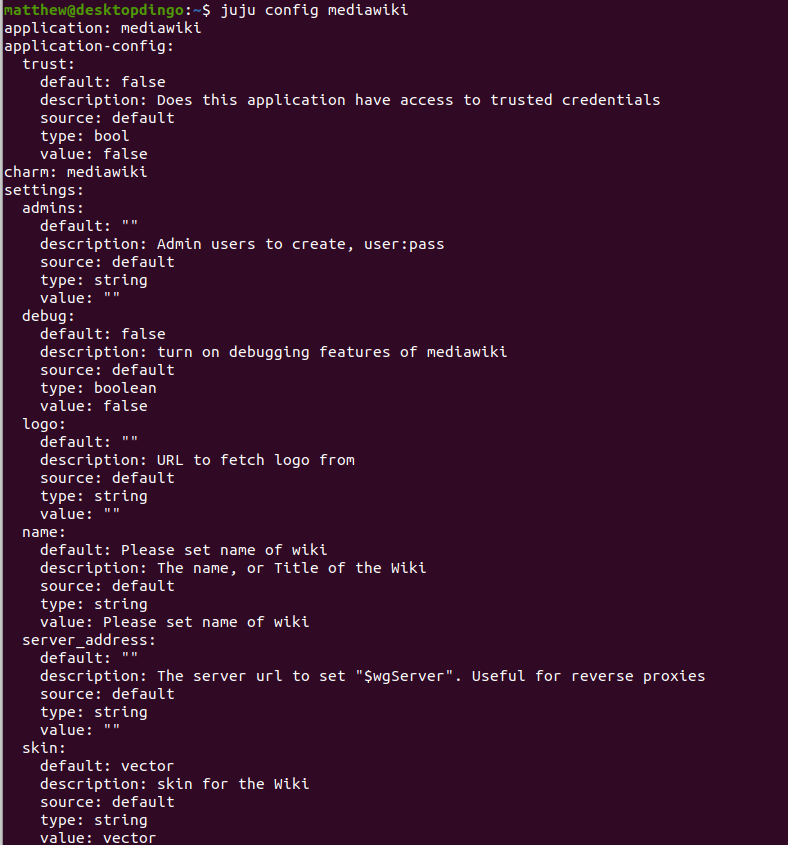
From there we can change some values with:
$ juju config mediawiki skin=monoblock name='Juju Wiki'
You can also set it from the Juju GUI:
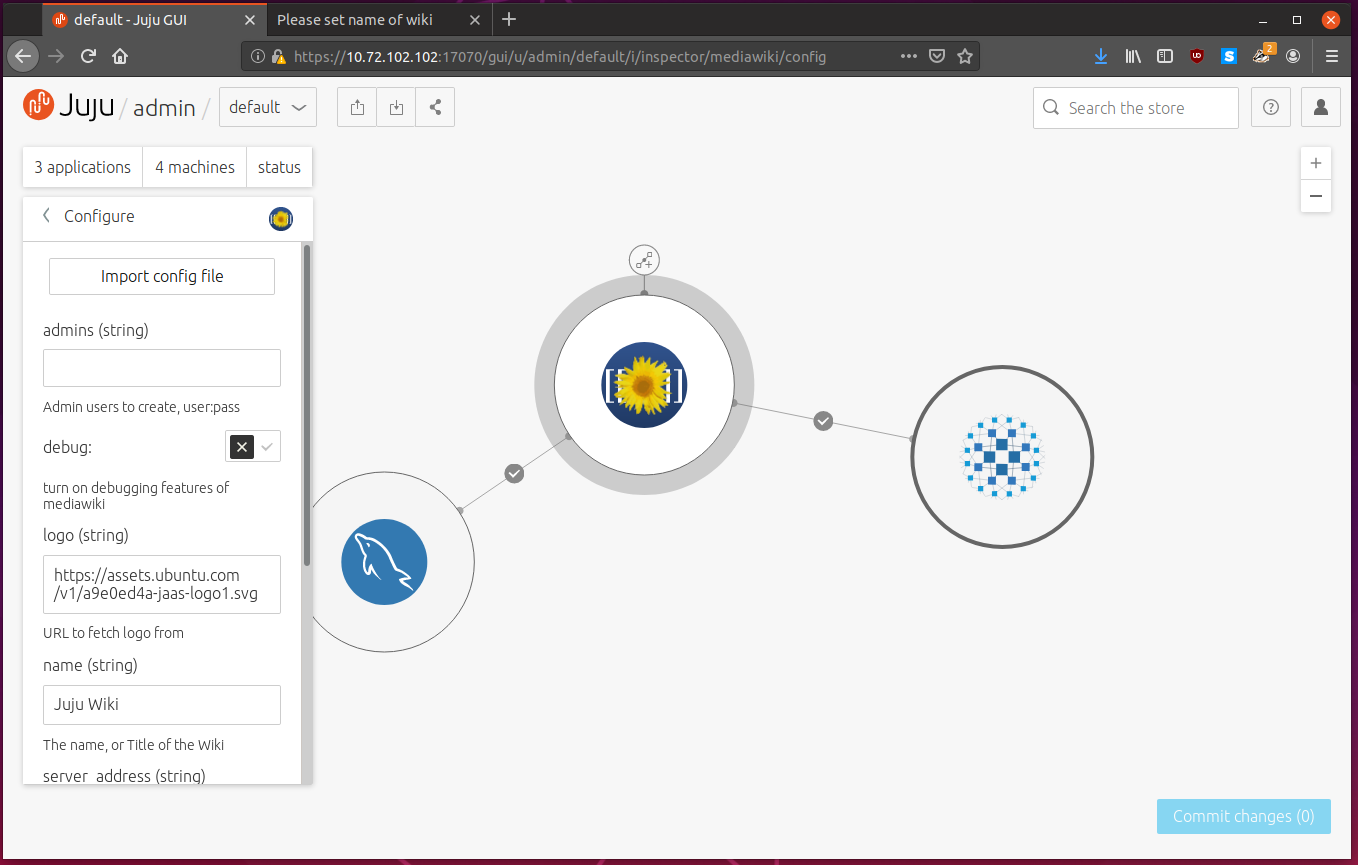
Changing the config calls the Juju config-changed hook, which will propagate the changes for you.
Scaling Our Deployment
When it comes to scaling software, we can scale vertically or horizontally.
Vertically means to throw big powerful hardware at the problem, and deploy the application which needs more power onto a big expensive server with lots of dedicated ram, lots of fast cpu cores and lots of fast storage.
Horizontally means to add lots of smaller instances and loadbalance between them. This is normally the more cost effective route, since when you have high demand, you add more machines, and when demand wanes, you turn some machines off.
Juju is capable of both, but with the power of relations, things are skewed to scaling horizontally, which can save you money while still having great performance.
Scaling vertically is known as adding constraints in Juju, and scaling horizontally is known as adding more units, and letting relations do all the hard work.
Adding Units
As mentioned in the architecture section, units are instances of an application which normally runs on their own machines. We don’t have to deploy the application again, we can simply add more units.
We can do this with the juju add-unit command:
$ juju add-unit -n 2 mediawiki
This will go and provision two new machines, and it will deploy the mediawiki charm to them. They will then automatically link up with the relations in place, and will automatically be load balanced by haxproxy, and share the same mysql database.
Isn’t that powerful? With just one command we can spin up as many instances as we want, and they “just work” and link into all existing configuration.
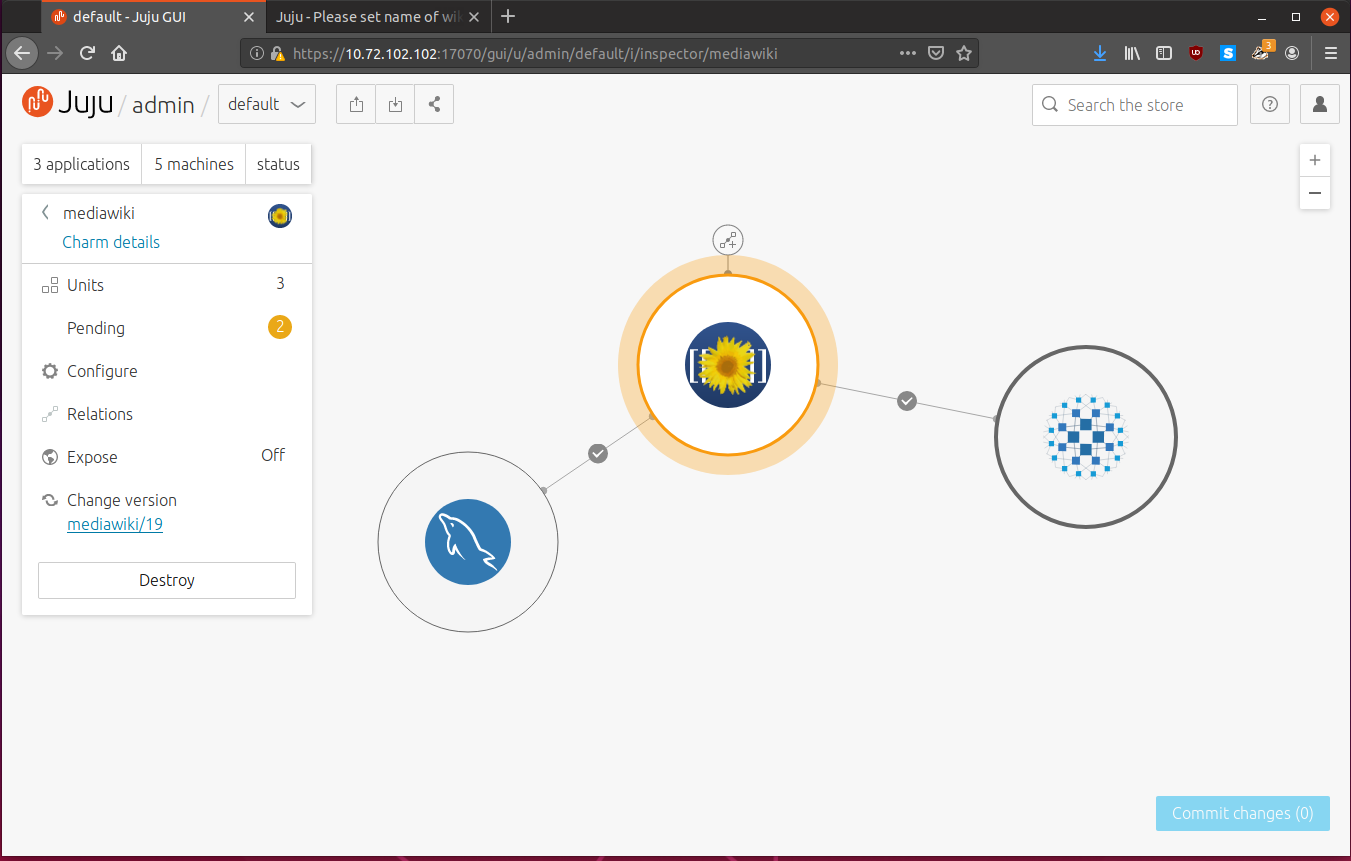
Looking at Juju GUI, we now see that we still have 3 applications, but we now have 5 machines. Clicking mediawiki we see that there are now 3 units. The two pending actions are the machines being brought up, software installed and relations added.
As always, we can query the status of the cluster with juju status:
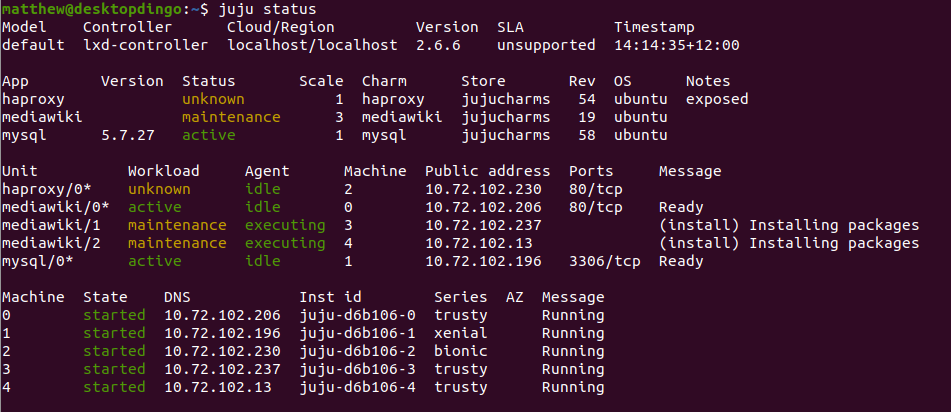
Once the machines are ready, revisit the haproxy IP address and you will be automatically loadbalanced between the mediawiki instances. It’s all pretty transparent, so you won’t actually see any difference.
You can add more haproxy and mysql units as necessary as well. Their charms have been set up so each unit will peer between the other units and replicate databases and connection information.
Isn’t that powerful? I think it is. I think its insanely powerful.
Using Constraints
Constraints are extensively talked about in the documentation.
Constraints are minimum hardware specifications for machines that we deploy charms to, and can be done on a per controller, per model, per charm or per unit basis.
Note: For lxd clouds, constraints are handled as resource maximums and not minimums.
We can set constraints when deploying charms with --constraints:
$ juju add-unit mysql --constraints mem=4G
$ juju deploy apache2 --constraints "mem=6G cores=2"
The above commands would make a machine and deploy a new mysql unit with 4gb of ram, and an apache2 machine with 6gb of ram and 2 cores. On cloud environments it will select the nearest instance type for the requested resources.
To set constraints for all applications in the model, run:
$ juju set-model-constraints mem=4G
And all future deployments will use at least 4GB ram.
You can view constraints with:
$ juju get-constraints mysql
Removing Units
We can scale down by removing units with juju remove-unit:
From juju status, we can the unit number to remove:
$ juju status mediawiki
Model    Controller      Cloud/Region         Version  SLA          Timestamp
default  lxd-controller  localhost/localhost  2.6.6    unsupported  14:41:28+12:00

App        Version  Status  Scale  Charm      Store       Rev  OS      Notes
mediawiki  1.19.14  active      3  mediawiki  jujucharms   19  ubuntu

Unit          Workload  Agent  Machine  Public address  Ports   Message
mediawiki/0*  active    idle   0        10.72.102.206   80/tcp  Ready
mediawiki/1   active    idle   3        10.72.102.237   80/tcp  Ready
mediawiki/2   active    idle   4        10.72.102.13    80/tcp  Ready

Machine  State    DNS            Inst id        Series  AZ  Message
0        started  10.72.102.206  juju-d6b106-0  trusty      Running
3        started  10.72.102.237  juju-d6b106-3  trusty      Running
4        started  10.72.102.13   juju-d6b106-4  trusty      Running
Lets remove mediawiki unit 2, which is running on machine 4.
$ juju remove-unit mediawiki/2
Easy.
Creating and Switching Models
As I mentioned before, models are a canvas of related software which makes up a deployment. If I want to install a bunch of other related software, like gitlab and jenkins, I would create another model to deploy these to.
You can create models with juju add-model [name].
$ juju add-model gitdev
Added 'gitdev' model on localhost/localhost with credential 'localhost' for user 'admin'
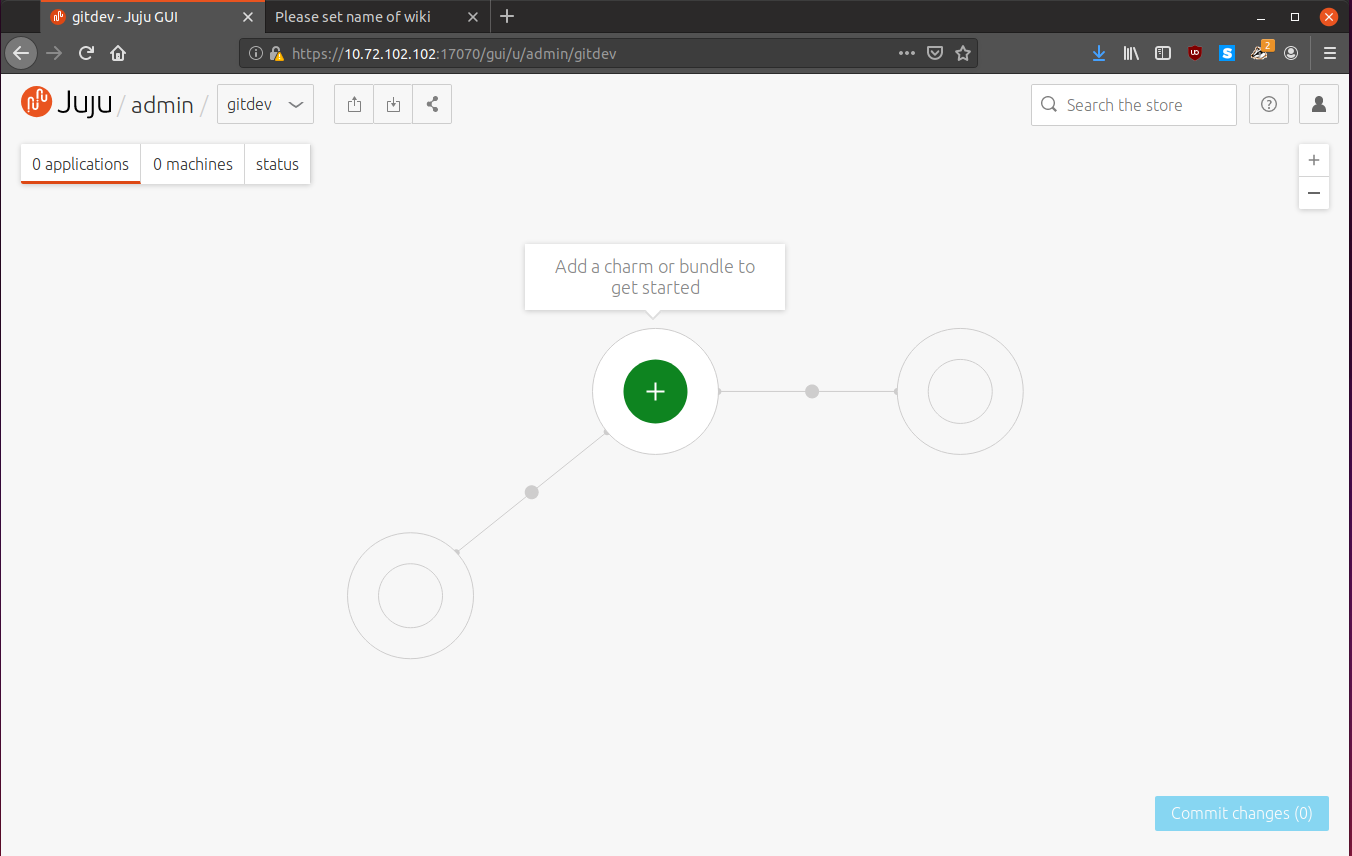
Looking at the GUI, we have a fresh new model called “gitdev” which we can select from the top models drop down menu:
We can use juju models to get a list of models:

We can switch between models with juju switch [model]:
$ juju switch default
lxd-controller:admin/gitdev -> lxd-controller:admin/default
And we see that we have switched back to our first model, default:

Note that most commands will apply to the currently selected model, so make sure you are in the model you want before deploying or removing machines.
Debugging and Accessing Individual Machines
We can list all machines the controller knows about with juju machines:

If you look closely, it is the same output as the machine section of juju status:

We can ssh into individual machines with juju ssh [machine]:
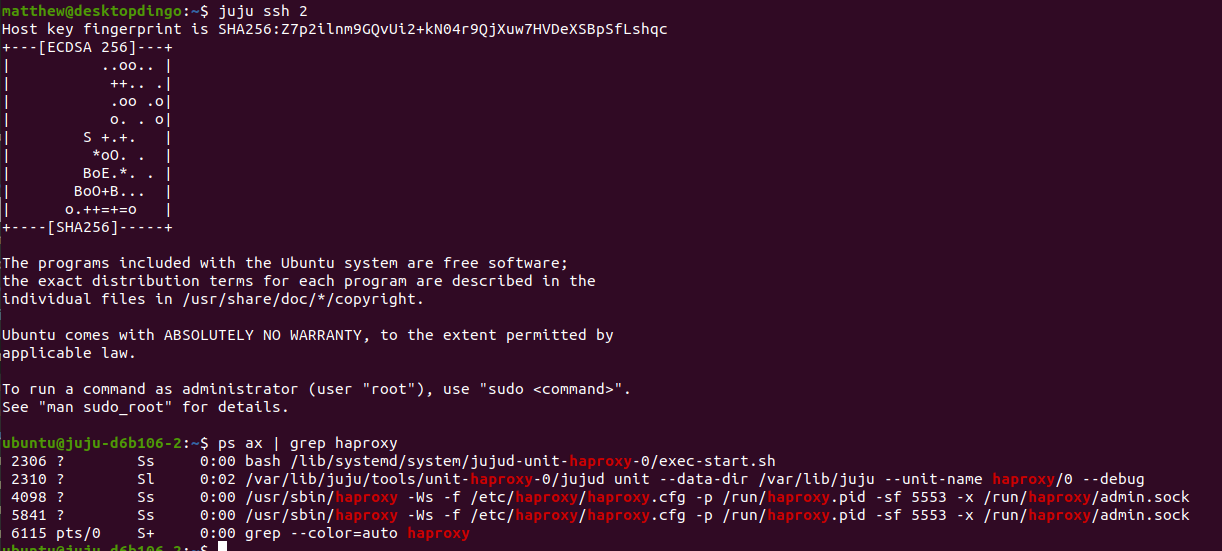
From there you can perform any maintenance or browse through the logs in
/var/log/syslog.
Exit the ssh session like you normally would with exit or ctrl-d.
You can gather debug information from all machines with juju debug-log
$ juju debug-log
unit-mediawiki-0: 15:08:18 INFO juju.worker.uniter.operation skipped "update-status" hook (missing)
unit-haproxy-0: 15:08:55 INFO juju.worker.uniter.operation skipped "update-status" hook (missing)
unit-mediawiki-1: 15:11:39 INFO juju.worker.uniter.operation skipped "update-status" hook (missing)
unit-mysql-0: 15:12:14 INFO juju.worker.uniter.operation skipped "update-status" hook (missing)
unit-mediawiki-0: 15:12:42 INFO juju.worker.uniter.operation skipped "update-status" hook (missing)
unit-haproxy-0: 15:13:13 INFO juju.worker.uniter.operation skipped "update-status" hook (missing)
unit-mediawiki-1: 15:15:56 INFO juju.worker.uniter.operation skipped "update-status" hook (missing)
unit-mysql-0: 15:17:24 INFO juju.worker.uniter.operation skipped "update-status" hook (missing)
unit-mediawiki-0: 15:18:10 INFO juju.worker.uniter.operation skipped "update-status" hook (missing)
unit-haproxy-0: 15:18:31 INFO juju.worker.uniter.operation skipped "update-status" hook (missing)
This will tail -f all Juju agent logs, which is useful if you need to debug an
outage.
You can run a command on all machines with juju run [command] like:
$ juju run "uptime" --all
- MachineId: "0"
  Stdout: |2
     03:23:18 up  3:01,  0 users,  load average: 1.03, 1.04, 0.85
- MachineId: "1"
  Stdout: |2
     03:23:18 up  2:51,  0 users,  load average: 1.03, 1.04, 0.85
- MachineId: "2"
  Stdout: |2
     03:23:18 up  2:50,  0 users,  load average: 1.03, 1.04, 0.85
- MachineId: "3"
  Stdout: |2
     03:23:18 up  1:10,  0 users,  load average: 1.03, 1.04, 0.85
Set --all to run the command on all machines, or you can specify a specific
machine by its machine id. The output is listed for each machine.
Tearing our Deployment Down and Cleaning Up
If you need to remove units, applications or entire models, it is always a good idea to read the removal documentation before you do anything to make sure you won’t accidentally destroy any data.
We can remove application units with juju remove-unit [aplication/unit]:
$ juju remove-unit mediawiki/1
We can remove applications and their units with juju remove-application [application]:
$ juju remove-application haproxy
We can remove the model to remove all applications:
$ juju destroy-model default
WARNING! This command will destroy the "default" model.
This includes all machines, applications, data and other resources.

Continue [y/N]? y
Destroying model
Waiting for model to be removed, 2 machine(s), 2 application(s)........
Waiting for model to be removed, 1 machine(s), 2 application(s)...
Waiting for model to be removed, 1 machine(s), 1 application(s)...
Waiting for model to be removed, 1 application(s)...
Model destroyed.
Finally, to remove controllers, we can run juju destroy-controller [controller]:
$ juju destroy-controller lxd-controller
WARNING! This command will destroy the "lxd-controller" controller.
This includes all machines, applications, data and other resources.

Continue? (y/N):y
Destroying controller
Waiting for hosted model resources to be reclaimed
All hosted models reclaimed, cleaning up controller machines
We should be back to a clean slate now, and everything has been cleaned up, with all lxd machines destroyed.
Conclusion
Well, there you have it. In this blog post we learned about Juju, a tool which enables you to easily deploy complex software to the cloud and scale it effortlessly. We looked at Charms, the installation instructions Juju uses to deploy software, which are written by experts of the software in question.
We deployed a mediawiki service, which was made up of mediawiki, mysql and haproxy, and scaled it to meet our needs.
We went through common Juju usage and got a good feel of the tool.
I’m still impressed with the concept of relations and how easy it enables
scaling with juju add-unit.
juju is:
It sure is.
I hope you enjoyed reading this article, as as always feel free to contact me.
Matthew Ruffell