In my previous blog post about Juju, a tool which lets you deploy and scale software easily, we learned what Juju is, how to deploy some common software packages, debug them, and scale them.
Juju deploys Charms, a set of instructions on how to install, configure and scale a particular software package. To be able to deploy software as a Charm, a Charm has to be written first. Usually Charms are written by experts in operating that software package, so that the Charm represents the best way to configure and tune that application. But what happens if no Charm exists for something you want to deploy?
Today we are going to learn how to write our own Charms using the original Charm writing method, by making a Charm for the Minetest game server. So fire up your favourite text editor, and lets get started.
What Do We Want to Deploy?
Before we start writing our Charm, we need to collect a list of requirements and things we want to build into our Charm.
We are going to deploying a server for Minetest, which is an open source voxel game engine which implements different sub-games. Minetest is pretty much the open source alternative for Minecraft.
Minetest is written mostly in C++ and Lua, so it has excellent performance, and the game is designed to be modded. There are also a ton of configuration options that can be tweaked, so we can build those things into our Charm.
To make things a little more interesting than a basic single application Charm, I see that Minetest supports PostgreSQL as a database backend.
PostgreSQL in Minetest offers performance improvements over using the default SQLite3 DB, as well as offering the ability to store multiple Minetest “worlds” in the same PostgreSQL database instance.
So our requirements for our Minetest Charm will be:
- To deploy minetest-server.
- To be able to edit and set minetest-server configuration variables.
- To use PostgreSQL as a database backend.
Lets get started.
Original Charms Vs Reactive Charms
There are several methods to write Charms, and each method has evolved over time with different major versions of Juju.
The original method of writing Charms was introduced in Juju 1.0, and while simple, they had the downside of not being able to know anything about a deployments state. Reactive Charms solve this problem, by storing and managing state, but it also required a fundamental change in how Charms are written.
There are a lot of Charms out there, some use the older original method, and others have been upgraded or written in the reactive method. Since both methods are still widespread, and it is likely that Charms written in both methods will need to be maintained into the future, I will eventually cover both methods. For now, we will tackle learning the original method in this blog post.
Original Charm Writing Method
I’m more or less going to be following along on the Juju documentation for the first generation charms.
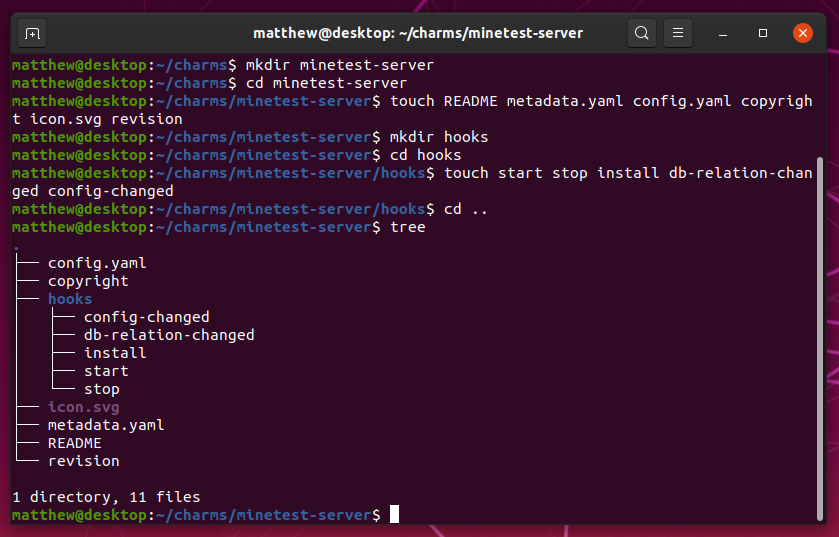
Create Charm Directory Structure
Charms are more or less a collection of text files, which makes writing and modifying them very straightforward.
We will start by making a directory for our charms to live in:
$ cd ~
$ mkdir charms
$ cd charms
From there, a Charm is the collection of text files inside a directory, so we will make the directory structure we need:
$ mkdir minetest-server
$ cd minetest-server
$ touch README metadata.yaml config.yaml copyright icon.svg revision
$ mkdir hooks
$ cd hooks
$ touch start stop install db-relation-changed config-changed
Your directory structure should now look like this:
Edit the README File
All Charms need a README file, where we document what the Charm does, how to deploy it, and what its configuration options are.
Minetest is a fun, free and open source voxel game inspired by Minecraft.
It supports various game modes, like survival and creative, and many more can
be added with mods.

This Charm deploys a basic game server, and is backed by a PostgreSQL database
for maximum performance. There are no mods, so you will need to add them
yourself.

To deploy:

$ juju bootstrap
$ juju deploy postgresql
$ juju deploy minetest-server
$ juju expose minetest-server
Edit the revision File
The revision file keeps track of the Charm version. We are going to keep this simple, by saying that this is the first version:
1
Create the metadata.yaml File
The metadata.yaml file tells Juju what this Charm is for, and what relations
this Charm is capable of. It also contains important information such as the
description, maintainer and so on.
The first part is straightforward:
name: minetest-server
summary: Minetest is a opensource voxel game designed to be modded.
maintainer: Matthew Ruffell <[email protected]>
description: |
    Minetest is a fun, opensource voxel game engine that can be customised with
    different game modes and mods.
    This charm installs Minetest with a PostgreSQL backend.
tags:
- social
series:
- eoan
- bionic
The next part involves describing the relations which this Charm provides. We need to list the relation type (provides, requires or peers), the name of the relation, and the interface type.
We have two relations. We provide one, Minetest, and require one, PostgreSQL.
provides:
    server:
        interface: minetest
requires:
    db:
        interface: postgresql
We don’t need a peers section, because Minetest is not designed for clustering, and all players must connect to the same server instance. Minetest is not designed to scale unfortunately.
Putting it all together, we have a fully made metadata.yaml file:
name: minetest-server
summary: Minetest is a opensource voxel game designed to be modded.
maintainer: Matthew Ruffell <[email protected]>
description: |
    Minetest is a fun, opensource voxel game engine that can be customised with
    different game modes and mods.
    This charm installs Minetest with a PostgreSQL backend.
tags:
- social
series:
- eoan
- bionic
provides:
    server:
        interface: minetest
requires:
    db:
        interface: pgsql
Describe Configuration Options in config.yaml
Since we want users of our Charm to be able to configure the Minetest server
to suit their needs, such as changing the server message of the day, or the port
it is being served on, we need to define configuration variables in config.yaml.
This is also pretty straightforward.
The only thing to note is you should carefully consider what options you want to expose to your users. Users don’t really care about the fine details, so only expose what most people will understand and use.
Saying that, make sure you set sensible defaults. All Charms should work out of the box on first deployment. If people are interested in changing config, they will, otherwise they will leave everything alone.
An example config is: (inspired by the existing config.yaml in James Tait’s older minetest charm)
options:
    port:
        default: 30000
        description: Server port to listen on
        type: int
    server-name:
        default: "Minetest server"
        description: Name of the server
        type: string
    server-description:
        default: "Juju deployed Minetest server"
        description: Description of server
        type: string
    motd:
        default: "Welcome!"
        description: Message of the day
        type: string
    strict-protocol-version-checking:
        default: "false"
        description: Set to true to disallow old clients from connecting
        type: string
    creative-mode:
        default: "false"
        description: Set to true to enable creative mode (unlimited inventory)
        type: string
    enable-damage:
        default: "false"
        description: Enable players getting damage and dying
        type: string
    default-password:
        default: ""
        description: New users need to input this password
        type: string
    default-privs:
        default: "build,shout"
        description: |
            Available privileges: build, shout, teleport, settime, privs, ban
            See /privs in game for a full list on your server and mod configuration
        type: string
    enable-pvp:
        default: "true"
        description: Whether to enable players killing each other
        type: string
Set the Copyright of the Charm
All Charms should include a copyright file, which includes details about the copyright and licensing status of the files inside the Charm.
Initially I was unsure what to place in the file, so I asked around my team. The answer I got was that the Charm archive format does not specify a specific way to license an application, so most Charms follow the debian/copyright file format.
We will take the OpenStack Keystone Charm copyright file as inspiration, so the below will do:
Format: http://www.debian.org/doc/packaging-manuals/copyright-format/1.0

Files: *
Copyright: 2019, Matthew Ruffell.
License: GPL-3

License: GPL-3
 This package is free software; you can redistribute it and/or modify
 it under the terms of the GNU General Public License as published by
 the Free Software Foundation; either version 3 of the License, or
 (at your option) any later version.
 .
 This package is distributed in the hope that it will be useful,
 but WITHOUT ANY WARRANTY; without even the implied warranty of
 MERCHANTABILITY or FITNESS FOR A PARTICULAR PURPOSE.  See the
 GNU General Public License for more details.
 .
 You should have received a copy of the GNU General Public License
 along with this package; if not, write to the Free Software
 Foundation, Inc., 51 Franklin St, Fifth Floor, Boston, MA  02110-1301 USA
 .
 On Debian systems, the complete text of the GNU General
 Public License can be found in `/usr/share/common-licenses/GPL-3'.
Make an Icon for the Charm Store
If you want your Charm to look nice on the Charm store listing or on the Juju GUI, then you should probably set an icon.
We can use the Charms tools package to generate us a basic icon which we can then customise.
$ sudo snap install charm --classic
$ cd ~/charms/minetest-server
$ charm add icon
From there, open up icon.svg in Inkscape or whatever vector editor you like,
and make a nice icon:
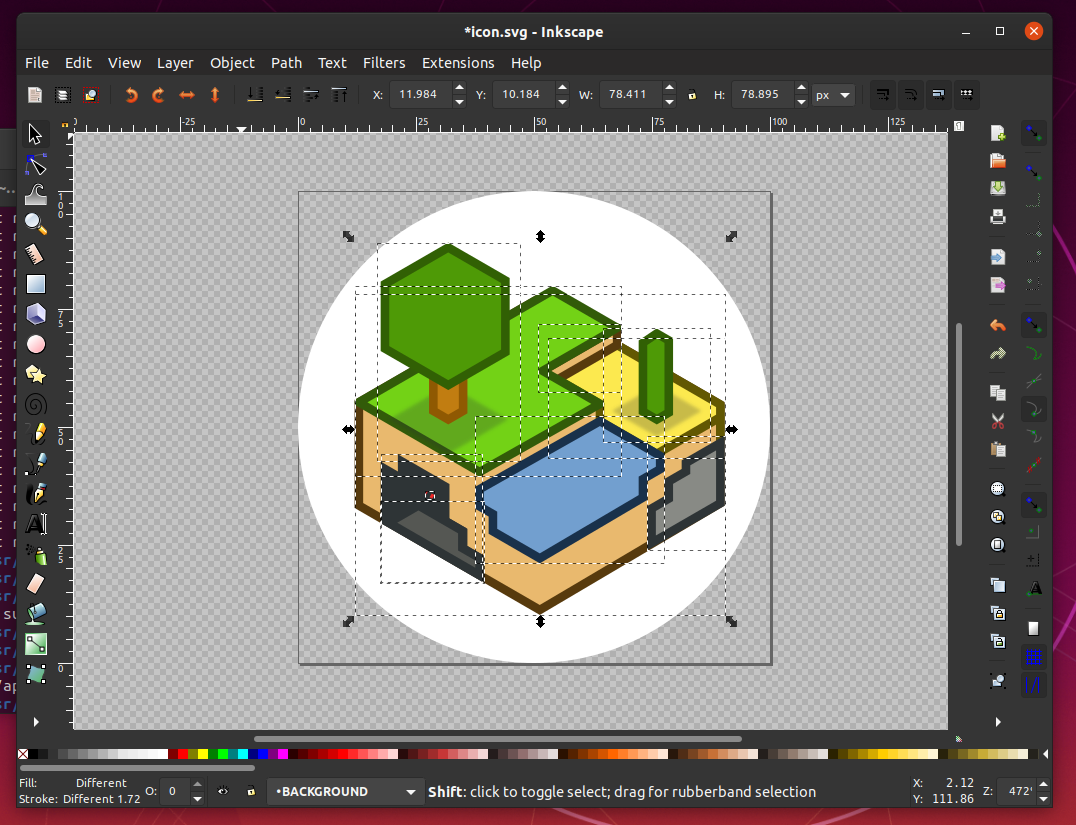
I used the icon found at /usr/share/icons/hicolor/scalable/apps/minetest.svg
to make this icon.
Write Hooks
Hooks are executable files which perform the actual work of installing and maintaining the Charm. Hooks are called by Juju at specific times when each hook is required. For example, the “install” hook is called when the Charm is being deployed, and it is responsible for installing the software to the machine.
Lets implement some hooks.
‘start’ Hook
We will begin with the “start” hook. We are going to make our Minetest server a systemd service, so all this needs to do is start the service:
#!/bin/sh

set -e

status=$(status-get)

if [ $status = "active" ]
then
    juju-log "Starting Minetest Server"
    systemctl restart minetest
fi

if [ $status != "active" ]
then
    juju-log "Minetest is not ready to start. Charm is not in active state."
fi
The set -e command tells Juju that if any command returns a non zero exit code,
indicating failure, the script will stop and raise an error, which Juju will
then communicate to its operator.
We use systemctl restart over systemctl start due to wanting our hooks to be
“idempotent”, which means the operation can be repeated many times without
changing the intended result. If we try and start an already running service,
we might error out and cause problems. Restart will down the service and get it
back up again, and hopefully reload config changes and the like.
‘stop’ Hook
The “stop” hook is similar to “start”, and just needs to stop the service.
#!/bin/sh

set -e

juju-log "Stopping Minetest Server"
systemctl stop minetest
‘install’ Hook
The “install” hook needs to install Minetest, and also install the systemd service files.
#!/bin/sh

set -e

juju-log "Installing Minetest from repos"
apt-get -y -qq install minetest

if ! getent group minetest > /dev/null ; then
    juju-log "Adding minetest group"
    addgroup --system minetest > /dev/null
fi

if ! getent passwd minetest > /dev/null ; then
    juju-log "Adding minetest user"
    adduser --system --home /home/minetest --ingroup minetest --gecos "Minetest server" minetest > /dev/null
fi

juju-log "Setting up configuration file"
mkdir -p /home/minetest/.minetest/worlds/world
cat > /home/minetest/.minetest/worlds/world/world.mt << EOF
port = 30000
server_name = Minetest server
server_description = Juju deployed Minetest server
motd = Welcome!
strict_protocol_version_checking = false
creative_mode = false
enable_damage = false
default_password =
default_privs = build,shout
enable_pvp = true
gameid = minetest
EOF
chown -R minetest:minetest /home/minetest/.minetest/

juju-log "Installing Minetest systemd service"
cat > /etc/systemd/system/minetest.service << EOF
[Unit]
Description=Minetest
Documentation=https://wiki.minetest.net/Main_Page

[Service]
Type=simple
User=minetest

ExecStart=/usr/games/minetest --server

ExecStop=/bin/kill -2 $MAINPID

[Install]
WantedBy=multi-user.target
EOF

juju-log "Enabling Minetest service"
systemctl enable minetest

status-set blocked "Waiting for database connection"
Notice the use of status-set blocked? We did that to tell Juju that we need
extra things in order to continue. In this case, we need a database, and for the
db-relation-changed hook to be executed before we can keep going.
status-set changes the status displayed by Juju status and blocked is pretty
self explanatory.
‘db-relation-changed’ Hook
Now that our install is waiting on a database connection, we had better sort
out what happens when we connect our database via a relation. In this case, we
want to populate our world.mt file, with database credentials and such.
We can do that with the db-relation-changed hook:
#!/bin/bash

set -e

status-set maintenance "Configuring the database"

db_user=$(relation-get user)
db_database=$(relation-get database)
db_pass=$(relation-get password)
db_host=$(relation-get private-address)
db_port=5432

if [ -z "$db_user" ]; then
  juju-log "No database information sent yet. Silently exiting"
  exit 0
fi

juju-log "Got database credentials. Making new database"

cat >> /home/minetest/.minetest/worlds/world/world.mt << EOF
backend = postgresql
player_backend = postgresql
auth_backend = sqlite3
pgsql_connection = host=$db_host port=$db_port user=$db_user password=$db_pass dbname=$db_database
pgsql_player_connection = host=$db_host port=$db_port user=$db_user password=$db_pass dbname=$db_database
EOF

juju-log "Starting Minetest service"
systemctl restart minetest

status-set active
Charms need to communicate over their relations to exchange important data. For
our db-relation-changed hook, we want to talk to the PostgreSQL Charm to obtain
database credentials that Minetest will use to connect and access the database.
We can do that with the hook tools relation-get to obtain variables, and
relation-set to send variables to the other Charm.
We used relation-get user to fetch the username, and relation-get password
for the database user’s password. These are all randomly generated when we
add the relation, so we can’t just hardcode these values.
‘config-changed’ Hook
The config-changed hook reacts to any changes made to the Charms configuration,
and writes those changes to the backing configuration file, and normally makes
an attempt at restarting the underlying service.
We can use the hook tool config-get to query the current value of a
configuration setting, and set it into the file with sed commands. The
config-changed hook in James Tait’s older minetest charm
does this very well.
#!/bin/sh

CONFIG_FILE=/home/minetest/.minetest/worlds/world/world.mt

PORT=`config-get port`
if [ ! -z "$PORT" ]; then
    sed -i -e "s/^port \= .*/port \= ${PORT}/" $CONFIG_FILE
fi
open-port $PORT/udp

SERVER_NAME=`config-get server-name`
if [ ! -z "$SERVER_NAME" ]; then
    sed -i -e "s/^server_name \= .*/server_name \= ${SERVER_NAME}/" $CONFIG_FILE
fi

DESCRIPTION=`config-get description`
if [ ! -z "$DESCRIPTION" ]; then
    sed -i -e "s/^server_description \= .*/server_description \= ${DESCRIPTION}/" $CONFIG_FILE
fi

MOTD=`config-get motd`
if [ ! -z "$MOTD" ]; then
    sed -i -e "s/^motd \= .*/motd \= ${MOTD}/" $CONFIG_FILE
fi

STRICT_PROTOCOL_VERSION_CHECKING=`config-get strict-protocol-version-checking`
if [ ! -z "$STRICT_PROTO_VERSION" ]; then
    sed -i -e "s/^strict_protocol_version_checking \= .*/strict_protocol_version_checking \= ${STRICT_PROTOCOL_VERSION_CHECKING}/" $CONFIG_FILE
fi

CREATIVE_MODE=`config-get creative-mode`
if [ ! -z "$CREATIVE_MODE" ]; then
    sed -i -e "s/^creative_mode \= .*/creative_mode \= ${CREATIVE_MODE}/" $CONFIG_FILE
fi

ENABLE_DAMAGE=`config-get enable-damage`
if [ ! -z "$ENABLE_DAMAGE" ]; then
    sed -i -e "s/^enable_damage \= .*/enable_damage \= ${ENABLE_DAMAGE}/" $CONFIG_FILE
fi

DEFAULT_PASSWORD=`config-get default-password`
if [ ! -z "$DEFAULT_PASSWORD" ]; then
    sed -i -e "s/^default_password \= .*/default_password \= ${DEFAULT_PASSWORD}/" $CONFIG_FILE
fi

DEFAULT_PRIVS=`config-get default-privs`
if [ ! -z "$DEFAULT_PRIVS" ]; then
    sed -i -e "s/^default_privs \= .*/default_privs \= ${DEFAULT_PRIVS}/" $CONFIG_FILE
fi

ENABLE_PVP=`config-get enable-pvp`
if [ ! -z "$ENABLE_PVP" ]; then
    sed -i -e "s/^enable_pvp \= .*/enable_pvp \= ${ENABLE_PVP}/" $CONFIG_FILE
fi
The more interesting part of the hook is right at the top with the open-port
hook tool. Since we can change what port the server binds to, we need to be able
to tell Juju what port to expose to the user. open-port does exactly this.
Mark All Hooks as Executable
All hook files need to be executable, so we need to ensure they are marked as
such. Do a quick chmod over the contents of the hooks directory.
$ chmod +x ~/charms/minetest-server/hooks/*
Deploying the Charm
Now that we have our Charm written, we need to test it to ensure it works, and debug it if it doesn’t. To do that, we are going to deploy it under debug mode and keep track of its progress.
Make a Juju Controller
Since this is Juju, we need to have a controller running if we don’t already have one configured. We are going to use LXD as our backing cloud to keep this easy.
I’m going to make my controller use eoan as the operating system, so I will set
--bootstrap-series=eoan when creating the controller.
$ juju bootstrap --bootstrap-series=eoan localhost lxd-controller
Creating Juju controller "lxd-controller" on localhost/localhost
Looking for packaged Juju agent version 2.7.0 for amd64
To configure your system to better support LXD containers, please see: https://github.com/lxc/lxd/blob/master/doc/production-setup.md
Launching controller instance(s) on localhost/localhost...
 - juju-9fba67-0 (arch=amd64)
Installing Juju agent on bootstrap instance
Fetching Juju GUI 2.15.0
Waiting for address
Attempting to connect to 10.72.102.88:22
Connected to 10.72.102.88
Running machine configuration script...
Host key fingerprint is SHA256:WWJ5Rrtbd0pNIPgNX1DYpuBq1PcnipRpiqIAVNKYMko
+---[RSA 2048]----+
| .+.      ... o=.|
|oEo.     o..o...+|
|+o      + =+ = +.|
|o      . *..+ =o |
|.       S..+..o.o|
|.         Bo o.oo|
|.      . =.. ....|
| .  . . . . .    |
|  .. .           |
+----[SHA256]-----+
Bootstrap agent now started
Contacting Juju controller at 10.72.102.88 to verify accessibility...

Bootstrap complete, controller "lxd-controller" now is available
Controller machines are in the "controller" model
Initial model "default" added
After that, we can check the status of juju controllers to make sure our
controller has been registered correctly:

Since we now have an active controller, we can also query juju status which
should be empty:

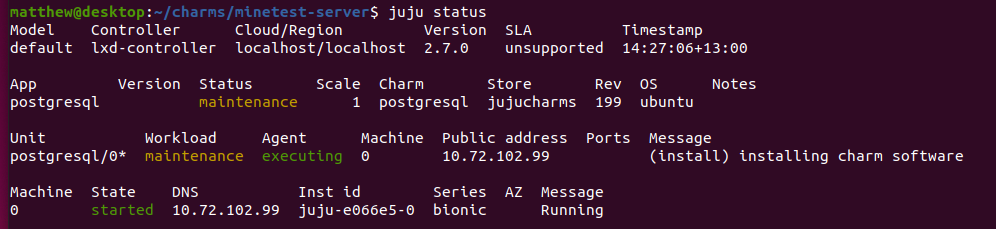
Deploy the PostgreSQL Charm
Our Minetest Charm depends on the PostgreSQL charm, so we will go ahead and deploy that first.
Searching the Charm Store brings us to the PostgreSQL Charm, which we can deploy with:
$ juju deploy postgresql
This gives us a single standalone PostgreSQL instance. The Charm supports clustering and such, but we won’t go to such efforts for our little Minetest world.
From there Juju will go and create a new bionic container and install PostgreSQL.
We can check juju status to keep tabs on progress.
Deploy the Minetest Charm
Here comes the moment of truth. Let’s deploy our Minetest Charm!
Firstly, in case this goes horribly, we will watch the debug logs. Open up a terminal tab and run:
$ juju debug-log
This lets us follow along on a very low level what Juju is doing.
We can deploy our local charm by simply referencing the directory it lives in:
$ juju deploy ~/charms/minetest-server --series eoan
Deploying charm "local:eoan/minetest-server-0".
Now we can check Juju status to see how it went:
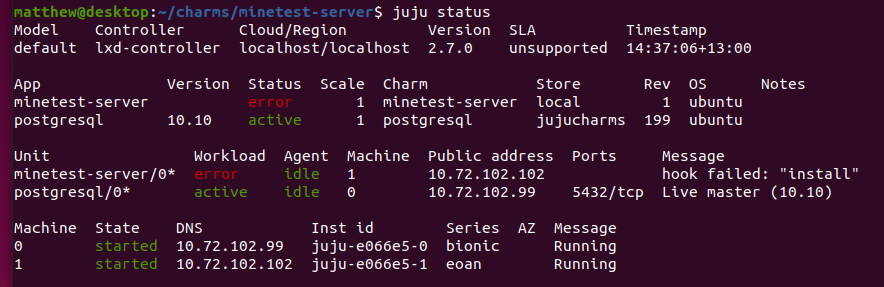
As you can see, my deploy went badly and got stuck on the install hook. Seems I forgot to set apt to automatically answer yes to commands. Ah well.
If this happens to you, you can remove the machine with:
$ juju remove-machine 1 --force
removing machine 1
- will remove unit minetest-server/0
$ juju remove-application minetest-server
removing application minetest-server
Just make sure you get the correct machine number from juju status.
Fix your mistakes, and then try and try again:
$ juju deploy ~/charms/minetest-server --series eoan
Deploying charm "local:eoan/minetest-server-0".
Eventually after enough revisions of fixing things, our Charm will be deployed and will be waiting for a database connection:
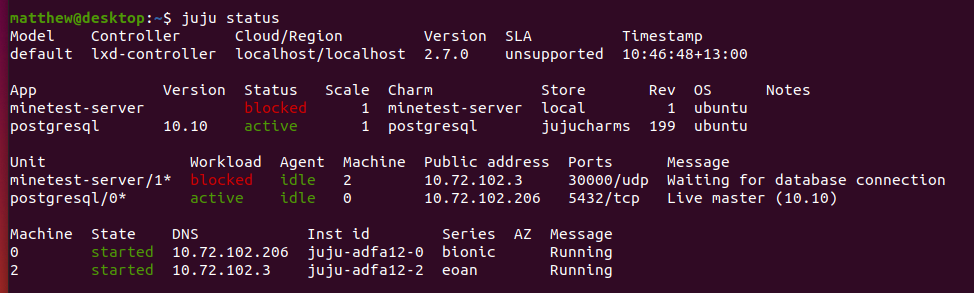
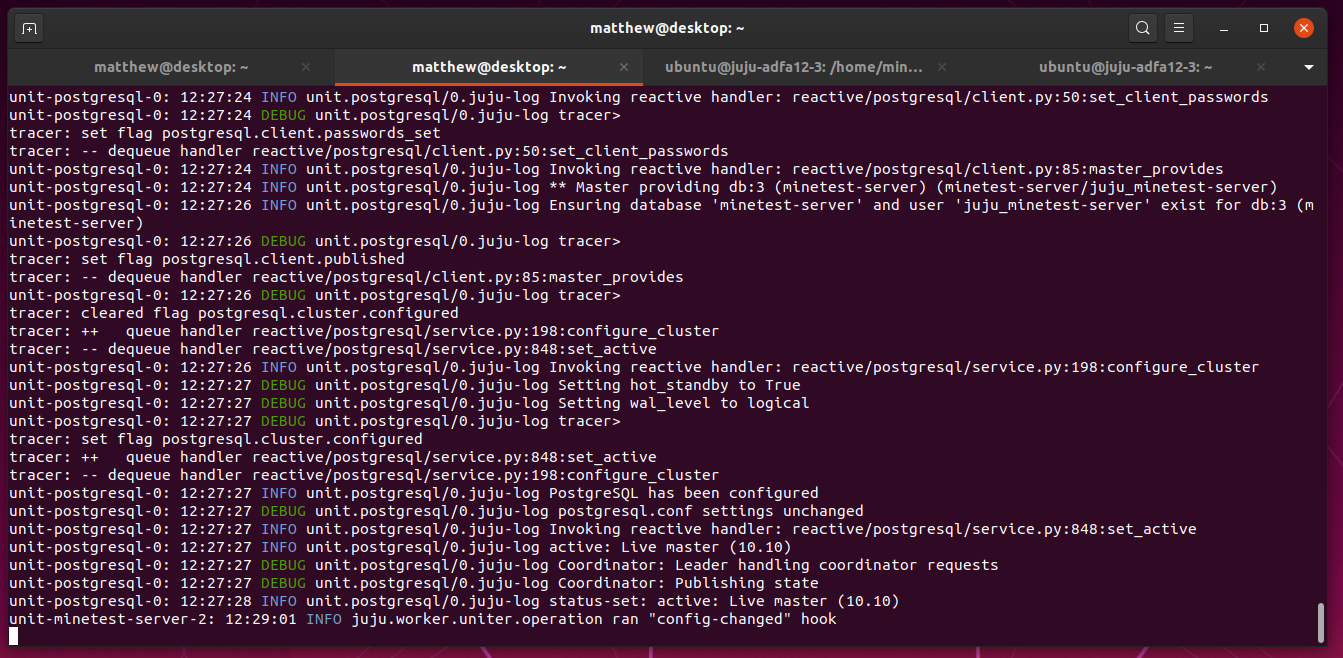
Time to get Minetest connected to PostgreSQL.
Add Relations
As we learned in the previous blog post, relations are connections between two Charms, where a Charm provides a service to another. In this case, we want the PostgreSQL Charm to offer database services to Minetest.
We can add a relation with:
$ juju add-relation postgresql:db minetest-server:db
Juju will automatically go and call the db-relation-changed hook in the
minetest-server Charm, and also call the same in postgresql Charm. The PostgreSQL
Charm will go and create a new user, database and set up passwords and permissions
properly, so everything is ready for us to relation-get the information from
our db-relation-changed hook.
We probably want to verify that everything went well, since this was a particular pain point in writing my charm.
We can issue juju ssh to get into the minetest-server unit, and from there
look to see if there are any database credentials in world.mt:
$ juju ssh 3
ubuntu@juju-adfa12-2:~$ cd /home/minetest/.minetest/worlds/world/
ubuntu@juju-adfa12-2:/home/minetest/.minetest/worlds/world$ ll
total 21444
drwxr-xr-x 2 minetest minetest     4096 Dec  1 21:46 ./
drwxr-xr-x 3 minetest minetest     4096 Dec  1 21:46 ../
-rw-r--r-- 1 minetest minetest     1054 Dec  1 22:04 world.mt
ubuntu@juju-adfa12-2:/home/minetest/.minetest/worlds/world$ cat world.mt
port = 30000
server_name = Minetest server
server_description = Juju deployed Minetest server
motd = Welcome!
strict_protocol_version_checking = false
creative_mode = false
enable_damage = false
default_password =
default_privs = build,shout
enable_pvp = true
gameid = minetest
backend = postgresql
player_backend = postgresql
auth_backend = sqlite3
pgsql_connection = host=10.72.102.206 port=5432 user=juju_minetest-server password=6yrPy37rM3GbPdzyZJGX29W5sX6jZdxJgYkJGF dbname=minetest-server
pgsql_player_connection = host=10.72.102.206 port=5432 user=juju_minetest-server password=6yrPy37rM3GbPdzyZJGX29W5sX6jZdxJgYkJGF dbname=minetest-server
Wow! Everything actually worked! Man, am I happy to see those credentials there.
Checking juju status once more should yield everything is okay:
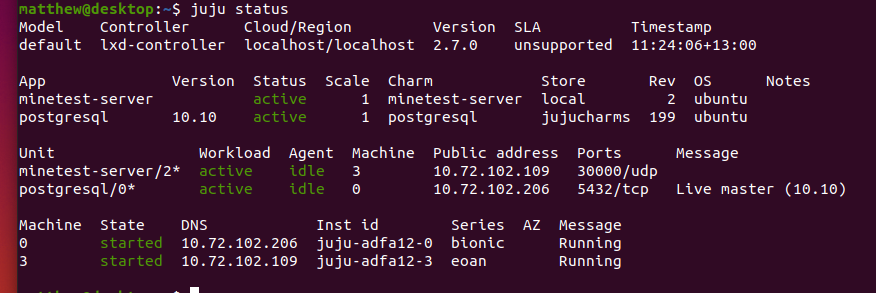
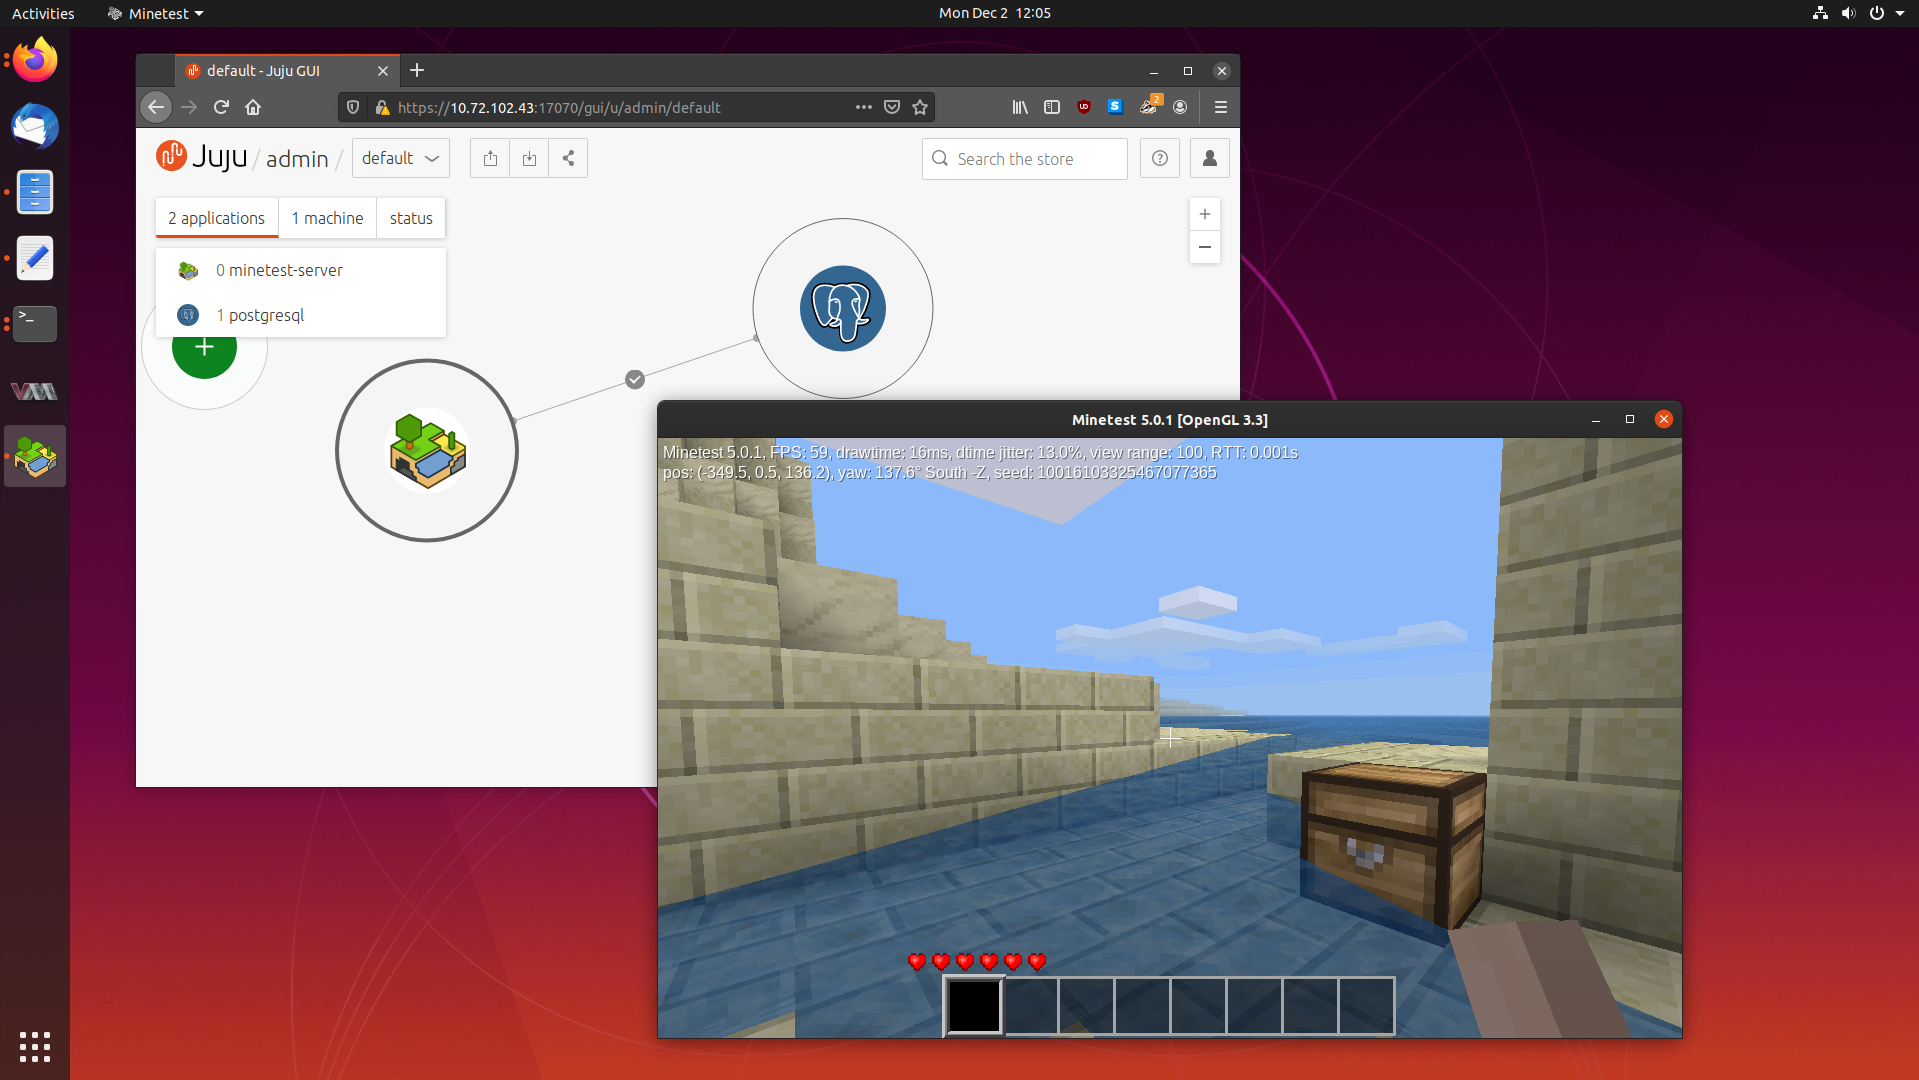
Time for the moment of truth. Can we connect to our server?
Start Minetest Client and Connect to Server
There’s one more thing we have to do before enjoying a game of Minetest, and that is opening the port of the game up to the world.
We can do this with juju expose.
$ juju expose minetest-server
Go ahead and open up Minetest on your computer and click the “Join Game” tab.
From juju status we see our Minetest server is running on 10.72.102.109 on
the default port of 30000.
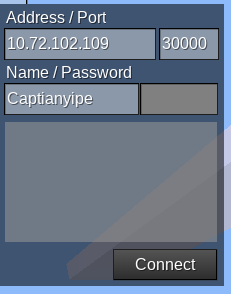
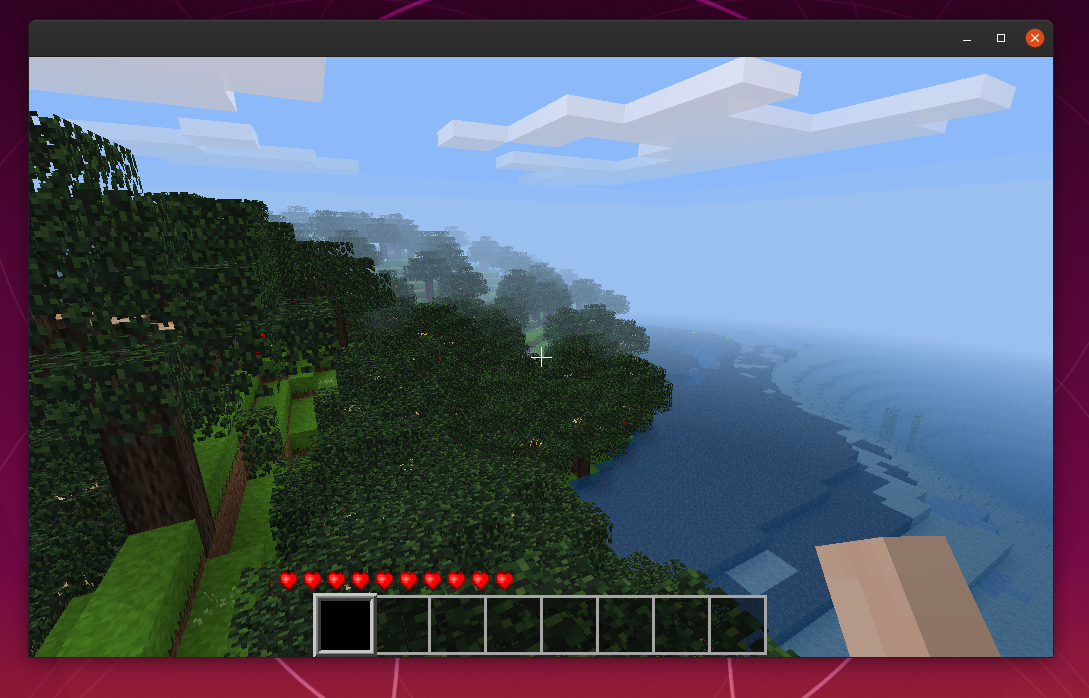
Hit connect and…
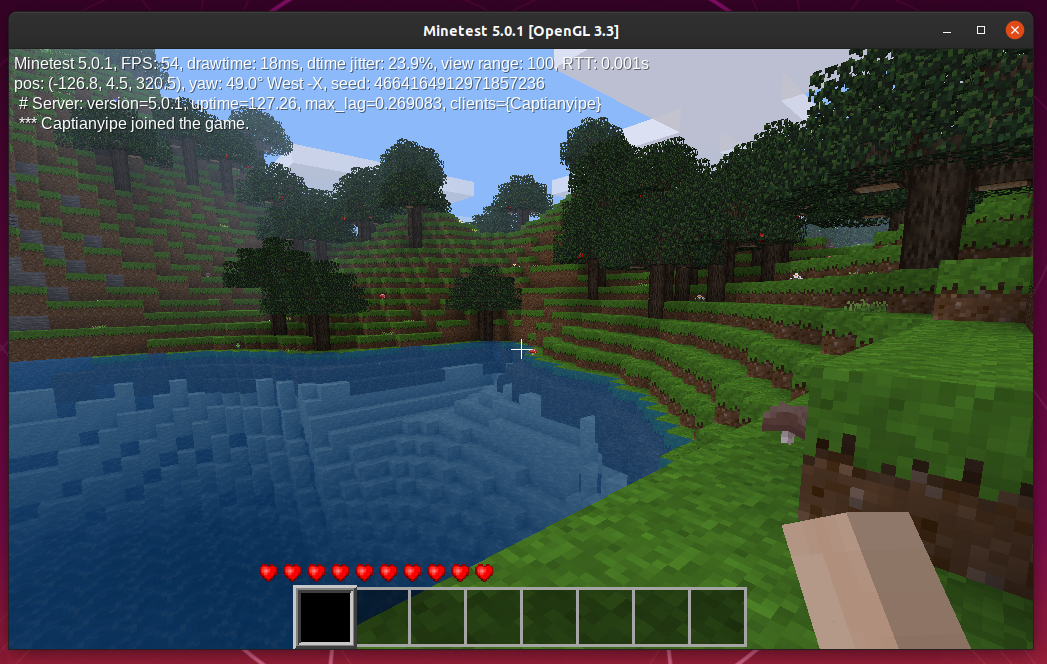
We are in the game, on a Juju deployed server!
Changing and Reloading Configuration
Now that we can play the game, if we want to change any of the configuration settings we wrote into the charm, we can use the Juju GUI, or the command line.
We can issue juju config to get a list of configuration options:

We can change it by issuing juju config followed by a list of options:
$ juju config minetest-server creative-mode=true
The start hook is automatically run after config-changed, which means once
config-changed has finished modifying the world.mt configuration file, the
server will automatically be restarted and the changed applied.
Debugging the Charm
There will be times when you are writing your Charm and things just don’t work as intended. Here are some ways that you can get more information on what is happening.
Getting Juju Logs
As mentioned before, if you run juju debug-log in another tab, you can keep
track of events, like specific hooks firing, and you can see a lot of detailed
error messages. This is the first place to look.
Manually Running Hooks
Sometimes if your hooks aren’t working correctly, and you would like to debug
further, you can switch to a internal tmux session in Juju by running
juju debug-hooks <application>/<unit id>.
For example:
$ juju debug-hooks minetest-server/2

This will allow you to run hook tools, such as config-get, config-set,
relation-list, relation-get and relation-set. For the relation tools, you
need to have a relation added first, and it usually works best when you remove
the relation, enter hook debugging, then re-add the relation while you are in
the tmux session.
From here you can run your hooks, and since they are suppose to be idempotent, you can keep running them, and examining your systems, to see if your live changes to the hooks work. The tmux session has vi and nano, so feel free to edit your hooks on the fly.
The tmux session is already in the directory of your Charm, and you are root, so you can modify anything.
root@juju-adfa12-3:/var/lib/juju/agents/unit-minetest-server-2/charm# ls
README  config.yaml  copyright  hooks  icon.svg  metadata.yaml  revision
Hook debugging really helped me to get this Charm working.
Cleaning Up
Once we have finished, We can shut down our services and remove them by issuing:
$ juju remove-application minetest-server
removing application minetest-server
$ juju remove-application postgresql
removing application postgresql
To clean up our controller, we can issue juju destory-controller. Note that
will remove all deployments to all models, so you should probably be sure you
really want to do this before you run it.
juju destroy-controller lxd-controller --destroy-all-models
WARNING! This command will destroy the "lxd-controller" controller.
This includes all machines, applications, data and other resources.

Continue? (y/N):y
Destroying controller
Waiting for hosted model resources to be reclaimed
Waiting on 1 model
All hosted models reclaimed, cleaning up controller machines
That’s it. All machines have been destroyed and we are back to a clean slate.
Conclusion
There we have it. We wrote our first Charm, and successfully managed to Juju deploy a Minetest server backed by a PostgreSQL database.
Along the way we learned what each part of the original method for writing Charms does, how to operate hook tools and debug our Charm.
Maybe now I can actually sit down and play the game instead of spending all this time writing the Charm, haha.
Hopefully you enjoyed the read, and as always feel free to contact me.
Matthew Ruffell